
First Aid Step 3 PDF: A Comprehensive Guide
First Aid Step 3 PDF guides offer vital knowledge for effectively managing medical emergencies. These resources consolidate expert advice, equipping individuals with step-by-step instructions. Access to a reliable PDF can empower you to provide immediate and potentially life-saving assistance. Remember to always prioritize safety!
First aid principles form the bedrock of emergency response, providing a framework for immediate care before professional medical help arrives. Understanding these fundamentals is crucial, whether you’re dealing with minor injuries or life-threatening situations. The core aim is to preserve life, prevent further harm, and promote recovery. This involves a systematic approach, prioritizing safety and efficiency.
A key aspect is recognizing the importance of early intervention. Prompt action can significantly improve outcomes, reducing the severity of injuries and potentially saving lives. First aid training emphasizes the need to assess the situation quickly, identify the problem, and take appropriate steps. This includes knowing how to control bleeding, manage breathing difficulties, and stabilize fractures.
Furthermore, first aid principles highlight the ethical considerations involved in providing care. This includes obtaining consent, respecting the patient’s wishes, and maintaining confidentiality. It also involves knowing your limitations and seeking professional help when necessary. By adhering to these principles, first aiders can provide effective and responsible care, making a positive difference in emergency situations. These principles are universal and apply regardless of the specific injury or illness encountered.
Step 1: Assessing the Situation and Ensuring Safety
The initial step in any first aid scenario is to meticulously assess the situation and ensure the safety of yourself, the casualty, and any bystanders. This critical stage sets the foundation for effective intervention and prevents further harm. Before approaching the casualty, take a moment to scan the surroundings, identifying potential hazards such as traffic, fire, unstable structures, or hazardous materials.
If any dangers are present, prioritize your safety by removing yourself and others from the immediate vicinity. If possible, eliminate or mitigate the hazard before proceeding. Once the scene is deemed safe, you can approach the casualty and begin your assessment. Observe the casualty’s surroundings for clues about the nature of the incident.
This may include looking for spilled medications, broken objects, or signs of a struggle. Remember to wear personal protective equipment (PPE), such as gloves and a mask, to minimize the risk of infection. By taking these precautions, you can protect yourself and others while providing essential first aid. A calm and methodical approach is key to accurate assessment and effective intervention. The safety of everyone involved should always be the paramount concern.
Step 2: Calling for Help and Activating Emergency Services
Once you’ve assessed the scene and ensured safety, the next crucial step is to call for help and activate emergency services. Promptly contacting emergency medical services (EMS) can significantly improve the casualty’s chances of survival and recovery. If you’re alone, use your mobile phone or ask a bystander to make the call. Provide the dispatcher with accurate information, including your location, the nature of the emergency, and the number of people injured.
Clearly describe the casualty’s condition, including their level of consciousness, breathing status, and any visible injuries. Stay on the line until the dispatcher instructs you to hang up, as they may need additional information or provide guidance. If possible, send someone to meet the ambulance and direct them to the casualty’s location.
In situations where you’re unsure whether to call EMS, err on the side of caution and make the call. It’s always better to have professional medical assistance on the way, even if it turns out to be unnecessary. Remember that time is of the essence in medical emergencies, and a rapid response can make a life-saving difference. Activating emergency services is a critical link in the chain of survival, ensuring that the casualty receives the necessary medical care as quickly as possible.
Step 3: Initial Assessment of the Patient (DRSABCD)
The DRSABCD action plan is a systematic approach to assessing a patient in an emergency situation. This acronym outlines the critical steps to follow when providing initial first aid. “D” stands for Danger, reminding you to ensure the safety of yourself, the patient, and bystanders. “R” represents Response, where you check for a response from the patient by gently shaking their shoulders and asking loudly, “Are you okay?”.
If there is no response, “S” signifies Send for help, meaning you should immediately call emergency services or ask someone else to do so. “A” stands for Airway, where you check if the patient’s airway is clear of any obstructions. If necessary, use the head-tilt/chin-lift maneuver to open the airway. “B” represents Breathing, where you assess if the patient is breathing normally. Look, listen, and feel for signs of breathing for no more than 10 seconds.
If the patient is not breathing or is breathing abnormally, “C” stands for CPR (Cardiopulmonary Resuscitation), which you should begin immediately. Finally, “D” represents Defibrillation, where you use an automated external defibrillator (AED) if one is available, following the device’s instructions. DRSABCD provides a structured framework for assessing and managing a patient until professional medical help arrives.
Step 4: Managing Breathing Emergencies
Breathing emergencies demand prompt and effective action to ensure adequate oxygen supply to the body. These situations can arise from various causes, including choking, asthma attacks, allergic reactions, and drowning. Recognizing the signs of a breathing emergency is crucial for timely intervention. Look for symptoms such as difficulty breathing, wheezing, gasping for air, bluish skin discoloration (cyanosis), and altered levels of consciousness.
For choking victims, the Heimlich maneuver (abdominal thrusts) is the primary technique to dislodge the obstruction. If the person is unresponsive, begin CPR, checking for the object in the airway each time before giving breaths. In asthma attacks, assist the individual in using their prescribed inhaler. For allergic reactions (anaphylaxis), administer epinephrine using an auto-injector if available.
In cases of drowning, immediately remove the person from the water and begin rescue breaths and CPR if necessary. Always call for emergency medical services as quickly as possible. Continuous monitoring of the patient’s breathing and responsiveness is essential until professional help arrives. Proper training in basic life support techniques can significantly improve outcomes in breathing emergencies.
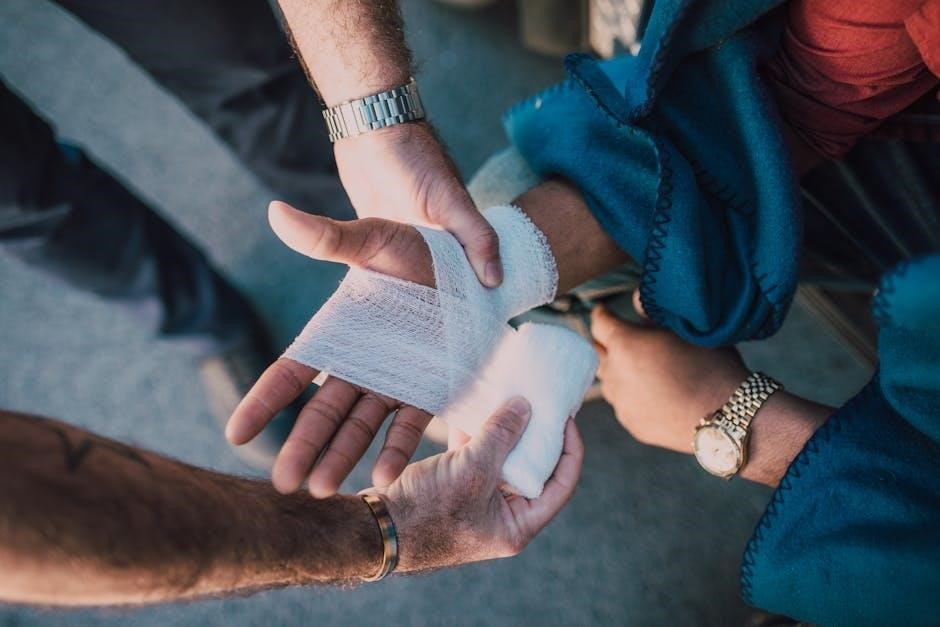
Step 5: Controlling Bleeding and Wound Care
Controlling bleeding and providing proper wound care are critical components of first aid. Uncontrolled bleeding can rapidly lead to shock and even death, so immediate action is essential. The first step is to apply direct pressure to the wound using a clean cloth or dressing. Maintain firm and continuous pressure until the bleeding slows or stops. If possible, elevate the injured limb above the heart to further reduce blood flow to the area.

For severe bleeding, consider using a tourniquet if direct pressure and elevation are insufficient. Apply the tourniquet tightly above the wound, and note the time of application. Seek immediate medical attention after applying a tourniquet. Once the bleeding is controlled, assess the wound for any foreign objects or signs of infection. Gently clean the wound with mild soap and water, avoiding harsh chemicals or scrubbing.
After cleaning, apply a sterile dressing to protect the wound from contamination. Change the dressing regularly and monitor for signs of infection, such as redness, swelling, pus, or increased pain. If any of these signs appear, seek medical advice promptly. Proper wound care promotes healing and minimizes the risk of complications. Remember to always wear gloves and a face mask.
Step 6: Addressing Burns and Scalds
Addressing burns and scalds promptly and effectively can significantly reduce pain and minimize long-term damage. The initial step involves immediately stopping the burning process. Remove the person from the source of heat or extinguish any flames. For chemical burns, flush the affected area with copious amounts of water for at least 20 minutes. Ensure personal safety by wearing appropriate protective gear, such as gloves.
Cool the burn with cool (not cold) running water for 10-20 minutes. This helps to reduce the temperature of the skin and prevent further tissue damage. Avoid using ice or applying ointments, butter, or other home remedies, as these can worsen the burn or increase the risk of infection. Remove any clothing or jewelry from the burned area, unless it is stuck to the skin.
Cover the burn loosely with a sterile, non-adhesive dressing. This helps to protect the burn from contamination and reduce pain. Do not break any blisters that may form. Seek immediate medical attention for severe burns, burns that cover a large area of the body, burns on the face, hands, feet, or genitals, or burns that involve difficulty breathing. Monitor the person for signs of shock, such as rapid heartbeat or shallow breathing, and provide reassurance.
Step 7: Dealing with Fractures, Sprains, and Strains (RICE)
When dealing with fractures, sprains, and strains, the RICE method is a crucial first aid approach. RICE stands for Rest, Immobilize, Cool, and Elevate, and it’s designed to minimize swelling, reduce pain, and promote healing in musculoskeletal injuries. Understanding how to properly apply RICE can significantly improve recovery outcomes before professional medical help arrives.
First, Rest the injured area. Avoid any unnecessary movement or weight-bearing on the affected limb. This prevents further damage and allows the healing process to begin. Next, Immobilize the injury using a splint, bandage, or other supportive device. Immobilization stabilizes the injured area, reducing pain and preventing further displacement of a fracture or aggravation of a sprain.
Then, Cool the injury by applying ice packs wrapped in a cloth for 15-20 minutes at a time, several times a day. Cooling reduces inflammation and numbs the pain. Finally, Elevate the injured limb above heart level. Elevation helps to reduce swelling by promoting fluid drainage away from the injured area. Remember to seek professional medical evaluation for all suspected fractures and severe sprains or strains.
Step 8: Managing Allergic Reactions and Anaphylaxis
Managing allergic reactions and anaphylaxis requires prompt recognition and decisive action. Allergic reactions can range from mild skin irritation to life-threatening anaphylaxis, a severe systemic reaction. Identifying the signs and symptoms of an allergic reaction, and knowing how to administer first aid, can be crucial in preventing serious complications.
Mild allergic reactions may present with symptoms like skin rash, itching, hives, or mild swelling. In such cases, removing the allergen, administering antihistamines, and monitoring the person are usually sufficient. However, anaphylaxis is a medical emergency characterized by difficulty breathing, wheezing, throat swelling, dizziness, confusion, rapid heartbeat, and loss of consciousness.
If anaphylaxis is suspected, immediately call for emergency medical services. If the person has an epinephrine auto-injector (EpiPen), assist them in administering it into the outer thigh. Ensure the needle is injected and held in place for the prescribed duration. After administering epinephrine, continue to monitor the person’s airway, breathing, and circulation. Lay the person flat and elevate their legs, if possible, unless they are having difficulty breathing. Be prepared to administer CPR if they become unresponsive. Remember, epinephrine is a temporary measure, and immediate medical attention is essential.
Step 9: Providing First Aid for Specific Conditions (Heart Attack, Stroke)
Providing first aid for specific conditions like heart attack and stroke demands swift recognition of symptoms and immediate action to minimize potential damage. A heart attack occurs when blood flow to the heart is blocked, depriving it of oxygen. Stroke, on the other hand, happens when blood supply to the brain is interrupted, either by a clot or a burst blood vessel. Both are life-threatening emergencies requiring immediate medical attention.
For a suspected heart attack, the key symptoms include chest pain or discomfort, shortness of breath, nausea, sweating, and pain radiating to the arm, jaw, or back. Immediately call emergency services, ensuring to describe the symptoms clearly. If the person is conscious, help them sit comfortably, loosen tight clothing, and reassure them while awaiting medical help. If they have been prescribed aspirin, and are not allergic, encourage them to chew and swallow it, as it can help thin the blood and improve blood flow.
In the case of a stroke, remember the acronym FAST: Face drooping, Arm weakness, Speech difficulty, and Time to call emergency services. Other signs may include sudden numbness or weakness, confusion, vision problems, severe headache, and loss of balance. Note the time when symptoms first appeared, as this information is crucial for medical professionals. Keep the person calm and comfortable, monitor their breathing, and be prepared to administer CPR if necessary. Do not give them anything to eat or drink, as this could cause choking.
Step 10: Recovery Position and Ongoing Monitoring
The recovery position is crucial for maintaining an open airway in an unconscious but breathing casualty, preventing choking on vomit or fluids. This position helps to keep the airway clear and allows for drainage, reducing the risk of aspiration. Once the casualty is placed in the recovery position, ongoing monitoring of their vital signs is essential until professional medical help arrives.
To place someone in the recovery position, kneel beside them. Extend the arm nearest to you upwards, and then place the other arm across their chest. Bend the leg furthest from you at the knee. Gently pull on the bent leg to roll the person towards you, ensuring they are lying on their side. Adjust the upper leg so that the hip and knee are bent at right angles to stabilize the body. Tilt the head back slightly to keep the airway open and ensure the mouth is open to allow drainage.
Continuous monitoring is vital. Regularly check their breathing, looking for chest movement and listening for breath sounds. Observe their skin color for any signs of cyanosis (bluish discoloration), which could indicate a lack of oxygen. If breathing stops, be prepared to initiate CPR. Keep the casualty warm and protected from the elements while waiting for emergency services to arrive. Provide clear and accurate information to the paramedics upon their arrival, including the casualty’s condition, the first aid administered, and any relevant medical history if known.
The Importance of First Aid Knowledge
First Aid Training and Certification Resources
Acquiring formal first aid training is paramount for effectively responding to emergencies. Numerous organizations offer comprehensive courses that equip individuals with the knowledge and skills to provide immediate assistance. Certification demonstrates competency and adherence to established first aid protocols. These certifications often require periodic renewal to ensure that skills remain current and aligned with the latest guidelines.
Reputable providers include organizations like St. John Ambulance, the American Red Cross, and various local community centers and hospitals. Courses typically cover essential topics such as CPR, wound care, managing bleeding, addressing burns, and recognizing signs of common medical emergencies like heart attack and stroke. Specialized courses, such as pediatric first aid, are also available for those who work with children or infants.

Online resources can supplement practical training, offering refresher materials and convenient access to information. However, hands-on practice is crucial for developing confidence and proficiency. Look for courses that include practical components, allowing you to practice techniques under the guidance of certified instructors. Completing a recognized first aid course not only enhances your ability to help others but also empowers you to act decisively and confidently in critical situations, potentially saving lives and minimizing the impact of injuries.
