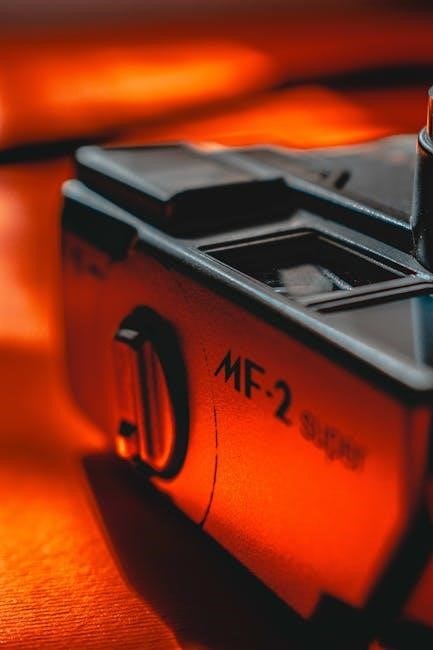
river flows in you piano sheet music pdf

Yiruma is a renowned South Korean composer and pianist. His piece‚ River Flows in You‚ composed in 2001‚ is a beautiful‚ emotive piano composition. Its simplicity and power have made it a favorite‚ widely appreciated and used in various media globally.

1.1 Overview of Yiruma

Yiruma‚ born Lee Ru-ma on February 15‚ 1978‚ in South Korea‚ is a celebrated composer and pianist. Known for his emotional and lyrical style‚ he has gained global recognition for his ability to create soothing and thought-provoking music. Yiruma’s journey began with classical piano training‚ which he further developed at King’s College in London. His compositions often blend elements of classical‚ contemporary‚ and new-age music‚ making them universally appealing. With albums like First Love and The Best, 10th Anniversary‚ Yiruma has established himself as a master of modern piano music. His work transcends cultural boundaries‚ resonating with listeners worldwide. Today‚ he is one of the most beloved pianists of his generation‚ inspiring countless aspiring musicians and music enthusiasts alike.

1.2 Overview of the Song

River Flows in You‚ composed by Yiruma in 2001‚ is a mesmerizing piano piece known for its emotional depth and simplicity. The song‚ written in A minor‚ features a flowing melody that evokes the gentle movement of a river. Its soothing and introspective nature has made it a favorite among pianists and music lovers worldwide. The composition is structured to build gradually‚ creating a sense of calm and reflection. Over the years‚ it has been widely used in films‚ commercials‚ and other media‚ further amplifying its popularity. The sheet music for River Flows in You is highly sought after‚ with both original and arranged versions available for pianists of all skill levels. Its universal appeal lies in its ability to connect with listeners on a deeply personal level‚ making it a modern classic in contemporary piano music.

1.3 Why It’s Popular

The enduring popularity of River Flows in You stems from its emotional depth and universal appeal. Its soothing melody and introspective nature create a strong personal connection with listeners. The song’s simplicity makes it accessible to pianists of all skill levels‚ while its complexity resonates with experienced musicians. Its widespread use in media‚ such as films and commercials‚ has further amplified its reach. Additionally‚ the availability of sheet music in various formats has made it a favorite among pianists. The emotional resonance and timeless quality of the piece continue to attract new audiences‚ ensuring its place as a modern classic in contemporary piano music.

Finding the Sheet Music Online

Popular websites like Pianoshelf and Piano Lessons Assen offer free PDF and MIDI downloads of River Flows in You. Various arrangements ensure accessibility for pianists of all levels.

2.1 Popular Websites

Several websites provide access to River Flows in You sheet music in PDF and MIDI formats. Platforms like MuseScore‚ Musicnotes‚ and Piano Nanny offer high-quality downloads. These sites often feature both free and paid versions‚ catering to different preferences. Additionally‚ PianoSheetMusicOnline and Pianotes are known for their extensive libraries‚ including various arrangements of the piece. Users can explore these platforms to find the version that suits their skill level and performance style. Many of these websites also provide interactive tools‚ such as virtual pianos‚ to enhance the learning experience. When downloading‚ ensure the source is reliable to maintain the quality and authenticity of the sheet music.

2.2 Tips for Choosing the Right Version

When selecting the right version of River Flows in You sheet music‚ consider your skill level and preferences. Beginners may opt for simplified arrangements‚ while advanced pianists might prefer the original or intricate versions. Check the arrangement details to ensure it aligns with your performance style. Look for versions that include dynamics‚ pedaling markings‚ and tempo indications for an authentic experience. Read user reviews and previews to assess the quality and accuracy of the sheet music. Some versions may include MIDI files or interactive tools for practice. Ensure the arrangement is compatible with your instrument and intended use‚ such as for personal practice or public performance. Additionally‚ verify the publisher or arranger to ensure the version is reputable and faithful to Yiruma’s composition. This helps in maintaining the emotional depth and beauty of the piece.

2.3 Verifying Authenticity

Verifying the authenticity of River Flows in You sheet music is crucial to ensure accuracy and quality. Look for versions published by reputable websites or publishers‚ such as STOMP Music‚ which holds the rights to Yiruma’s compositions. Check for copyright information‚ as authentic sheets will display proper licensing details. Be wary of unofficial arrangements that may lack proper attribution. Examine the sheet music for professional formatting‚ including clear notation‚ dynamics‚ and pedaling instructions. Compare the PDF with official previews or samples from trusted sources to ensure consistency. Avoid versions with missing pages or unclear markings‚ as these may be incomplete or unauthorized. Additionally‚ verify the publisher’s credentials and read user reviews to confirm the sheet music’s legitimacy. Ensuring authenticity guarantees a faithful representation of Yiruma’s composition‚ allowing for an accurate and enjoyable performance.

Downloading the PDF

Download the River Flows in You PDF from reputable sites like pianoshelf or PianoNotes. Ensure the file is in PDF or MIDI format for compatibility. Always verify the source for accuracy.

3.1 Steps to Download

To download the River Flows in You piano sheet music in PDF format‚ follow these steps:

  • Visit a reputable website such as pianoshelf or Pianotes.ru.
  • Search for “River Flows in You” in the search bar.
  • Select the desired version of the sheet music.
  • Review the preview to ensure it matches your needs.
  • Click the “Download” or “Download PDF” button.
  • Save the file to your device‚ ensuring it is in PDF or MIDI format.
  • Open the file using a PDF reader or music software to verify its contents.

Always ensure the source is reliable to avoid unauthorized versions;

3.2 Troubleshooting Common Issues

When downloading River Flows in You piano sheet music‚ users may encounter issues such as corrupted files or incompatible formats. To resolve these:

  • If the PDF fails to download‚ check your internet connection or try a different browser.
  • For corrupted files‚ re-download from a reliable source like pianoshelf or Pianotes.ru.
  • If the sheet music appears distorted‚ ensure your PDF reader is updated.
  • For MIDI files‚ install a MIDI player or use music software to view the notes.
  • Verify that your device supports the file format before downloading.

These steps can help resolve common download and viewing issues‚ ensuring a smooth experience with the River Flows in You sheet music.

3.3 Printing Tips

For optimal printing of River Flows in You piano sheet music:

  • Ensure your printer settings are set to “Actual Size” to maintain proper formatting.
  • Use high-quality paper (80-100 gsm) for clear and durable prints.
  • Choose portrait orientation‚ as most sheet music is designed vertically.
  • Adjust margins to “Narrow” or “Zero” to fit the entire composition on the page.
  • If the PDF includes multiple pages‚ enable duplex printing for front-and-back sheet music.
  • Preview the file before printing to ensure alignment and layout are correct.
  • Consider using a laser printer for sharper notes and cleaner lines.

These tips ensure your printed sheet music is clear‚ professional‚ and ready for performance.

Playing the Song

Mastering River Flows in You requires precise technique and emotional expression. Focus on tempo‚ dynamics‚ and arpeggios to capture its flowing melody. Practice slowly‚ then gradually increase speed for flawless performance.

4.1 Basic Techniques

Mastering River Flows in You begins with understanding its core techniques. The piece heavily relies on arpeggios‚ which are broken chords played in a smooth‚ flowing manner. Practicing these arpeggios with both hands is essential to achieve the song’s signature sound. Additionally‚ dynamics play a crucial role; the music transitions between soft‚ delicate moments and more powerful‚ emotional crescendos. Paying attention to tempo is also vital‚ as maintaining a steady rhythm is key to conveying the piece’s serene and flowing quality. Proper finger placement and dexterity are required‚ especially for the intricate transitions between notes. Starting with slower tempos and gradually increasing speed will help build confidence and accuracy; Finally‚ mastering pedaling techniques‚ such as the sustain pedal‚ can enhance the piece’s emotional depth by creating a resonant‚ echoing effect.

4.2 Intermediate Tips

For intermediate pianists‚ refining dynamics and tempo is crucial. Experiment with subtle variations in volume to enhance emotional depth‚ particularly during the crescendos and decrescendos. Pay attention to rubato‚ allowing slight tempo fluctuations to convey the piece’s expressive nature. Pedaling techniques can further elevate the performance; use the sustain pedal judiciously to create a lush‚ resonant sound without muddying the notes. Additionally‚ focus on hand coordination‚ ensuring seamless transitions between arpeggios and melodies. Practicing in smaller sections and gradually increasing speed will help solidify complex passages. Lastly‚ incorporate expression by varying touch—-legato for smoother sections and staccato for crisp‚ defined moments. These intermediate techniques will bring depth and nuance to your rendition of River Flows in You‚ making it more engaging and emotionally resonant.

4.3 Advanced Techniques

For advanced pianists‚ mastering nuanced phrasing and expressive dynamics is essential. Experiment with complex pedaling‚ such as using the sostenuto pedal for sustained harmonies or the una corda pedal for softer passages. Incorporate improvisational elements‚ adding personal touches while maintaining the piece’s core identity. Advanced players can also explore polyrhythms or harmonic variations to add depth. Pay attention to finger independence and dexterity‚ especially in the arpeggio sections‚ to achieve a smooth‚ flowing sound. Additionally‚ focus on dynamic contrasts and articulation to highlight the piece’s emotional peaks and valleys. For those seeking a challenge‚ consider arranging the piece for duet or experimenting with instrumental layers. These advanced techniques will allow you to interpret River Flows in You in a unique and sophisticated way‚ showcasing your technical and artistic skill.

Different Versions and Arrangements

River Flows in You is available in various versions‚ including original piano and arranged versions for guitar‚ violin‚ and even orchestral adaptations. Simplified and complex arrangements cater to different skill levels‚ ensuring accessibility for all musicians.

5.1 Original vs. Arranged Versions

The original version of River Flows in You is a solo piano piece‚ showcasing Yiruma’s delicate and emotive composition. It remains true to the artist’s intent‚ offering a pure‚ unadulterated listening experience. In contrast‚ arranged versions adapt the song for different instruments or ensembles‚ such as guitar‚ violin‚ or orchestral arrangements. These versions often reinterpret the melody‚ adding layers of depth while preserving the song’s essence. For example‚ some arrangements feature harmonized duets or instrumental solos‚ appealing to musicians seeking collaboration or variation. Both the original and arranged versions are widely popular‚ with the original being a favorite among purists and solo performers‚ while arranged versions attract those looking for creative interpretations or ensemble play. This versatility has contributed to the song’s enduring popularity across diverse musical genres and audiences.

5.2 Instrumental Arrangements

River Flows in You has inspired numerous instrumental arrangements‚ expanding its reach beyond solo piano. Popular arrangements include versions for guitar‚ violin‚ and even orchestral ensembles. These adaptations maintain the song’s emotional core while offering fresh interpretations. For instance‚ guitar arrangements provide a softer‚ acoustic vibe‚ while violin versions emphasize the melody’s lyrical qualities. Additionally‚ duet arrangements allow collaboration between pianists or cross-instrumental pairings‚ fostering creativity. Some arrangements also incorporate electronic elements or percussion‚ blending contemporary styles with the original’s simplicity. These diverse renditions ensure the song remains accessible to musicians of various skill levels and preferences‚ further cementing its universal appeal. The availability of such arrangements in PDF sheet music formats has made it easier for enthusiasts to explore and perform their favorite versions.

Historical Context and Composition

Composed in 2001‚ River Flows in You reflects Yiruma’s blend of Western classical techniques with Korean musical sensibilities. Its flowing‚ emotive style in A minor resonates deeply with listeners worldwide.

6.1 History of Composition

River Flows in You was composed by Yiruma in 2001 and first appeared on his album First Love. The piece was written during a period of significant artistic growth for Yiruma‚ blending Western classical and Korean musical influences. Its flowing‚ emotive style in A minor creates a soothing yet powerful melody. The composition reflects Yiruma’s ability to evoke deep emotion through simplicity. Over time‚ it has been arranged and performed by numerous artists‚ further cementing its place in modern piano culture. The piece is widely regarded as one of Yiruma’s most iconic works‚ resonating with audiences globally. Its enduring popularity has led to its inclusion in various media and its adaptation for different instruments‚ showcasing its timeless appeal and versatility.

6.2 Evolution Over Time

Since its release in 2001‚ River Flows in You has undergone significant evolution in its interpretations and arrangements. Initially a solo piano piece‚ it has been reimagined in various forms‚ including orchestral versions and instrumental covers. Its enduring appeal has led to collaborations with artists worldwide‚ blending diverse musical styles. The composition’s simplicity allows for creative freedom‚ making it a favorite for remixes and genre fusions. Over time‚ its popularity has grown exponentially‚ thanks to its presence in media and social platforms. This evolution has introduced the piece to new audiences‚ ensuring its relevance across generations and cultures. The continuous adaptation of River Flows in You highlights its timeless beauty and universal resonance‚ solidifying its place in contemporary music history.

The Song’s Impact

The song has deeply influenced piano culture‚ inspiring countless musicians and featuring prominently in films‚ commercials‚ and TV shows‚ enhancing its global appeal and emotional connection with audiences.

7.1 Impact on Piano Culture

River Flows in You has significantly shaped modern piano culture‚ becoming a cornerstone of contemporary instrumental music. Its lyrical and emotive style has inspired a new generation of pianists‚ blending simplicity with profound emotional depth. The piece’s accessibility has made it a favorite among both professionals and amateurs‚ fostering a sense of community in piano enthusiasts worldwide. It has also spurred the creation of countless tutorials‚ covers‚ and arrangements‚ further cementing its influence. The song’s widespread popularity has led to its inclusion in various media‚ introducing piano music to a broader audience and revitalizing interest in instrumental compositions. Yiruma’s work continues to be a benchmark for modern pianists‚ showcasing the power of music to transcend cultural and linguistic barriers. Its enduring appeal ensures its place as a timeless classic in piano repertoire.

7.2 Presence in Media

River Flows in You has become a staple in various forms of media‚ enhancing emotional depth in films‚ television shows‚ and commercials. Its calming yet powerful melody has been featured in numerous soundtracks‚ including romantic dramas and inspirational content. The song’s universal appeal has made it a popular choice for background music in documentaries‚ ads‚ and even social media videos. Its presence in media has introduced the piece to a broader audience‚ further amplifying its global recognition. Additionally‚ the song is often used in live performances‚ weddings‚ and other events‚ showcasing its versatility and emotional resonance. This widespread use in media has played a significant role in solidifying River Flows in You as a modern classic‚ transcending traditional piano music boundaries.

Learning Resources

Official websites like pianoshelf and forums offer River Flows in You tutorials and sheet music. Communities and virtual piano tools provide interactive learning experiences‚ helping pianists master the piece.

8.1 Official Websites

Several official websites provide authentic resources for learning and downloading River Flows in You sheet music. Websites like pianoshelf and Pianotes.ru offer high-quality PDF versions of the composition. These platforms are trusted sources‚ ensuring that the sheet music is accurate and legally distributed. Additionally‚ Yiruma’s official publisher‚ Stomp Music‚ often partners with these sites to provide authorized versions of his work; Many of these websites also include interactive tools‚ such as virtual pianos‚ to help learners practice and master the piece. When using these resources‚ it’s important to verify the authenticity of the sheet music to ensure it aligns with Yiruma’s original composition. Official websites are the best starting point for anyone seeking reliable materials to learn River Flows in You.

8.2 Forums and Communities

Forums and online communities are invaluable resources for pianists seeking guidance on River Flows in You. Platforms like Piano World and Reddit’s r/piano host discussions where musicians share tips‚ ask questions‚ and exchange experiences. These communities often provide links to reliable sheet music sources and offer feedback on performances. Additionally‚ websites like MuseScore and Piano Nanny feature user-generated content and collaborations‚ allowing learners to explore different arrangements and interpretations. Engaging with these forums can help pianists refine their technique and gain insights from more experienced players. Many users also share their own renditions‚ fostering a sense of camaraderie and shared passion for Yiruma’s iconic piece. These spaces are especially helpful for those looking for personalized advice or inspiration to master River Flows in You.

minnetonka size guide

Minnetonka footwear offers a wide range of styles‚ from moccasins to boots and sandals․ This guide helps ensure a perfect fit‚ combining comfort and style seamlessly for all;

Overview of Minnetonka Footwear

Minnetonka is a well-known brand offering high-quality‚ comfortable footwear inspired by Native American designs․ Their collection includes moccasins‚ boots‚ slippers‚ and sandals‚ catering to all ages and preferences․ Known for soft deerskin leather and durable craftsmanship‚ Minnetonka footwear combines tradition with modern style․ Whether for casual wear or special occasions‚ their shoes provide exceptional comfort and timeless appeal․ With a wide range of styles‚ from fringe moccasins to cozy slippers‚ Minnetonka ensures a perfect fit for everyone‚ making them a favorite choice for those seeking both functionality and fashion․

Importance of Proper Sizing for Comfort and Fit

Proper sizing is essential for comfort and a perfect fit in Minnetonka footwear․ Ill-fitting shoes can cause discomfort‚ blisters‚ or foot fatigue‚ while the right size ensures all-day wearability․ Accurate sizing also maintains the shoe’s durability‚ preventing excessive stretching or wear․ Minnetonka’s designs‚ like moccasins and boots‚ require precise fitting to deliver their signature comfort and support․ By using the size guide‚ customers can avoid the pitfalls of incorrect sizing and enjoy the full benefits of Minnetonka’s high-quality‚ stylish footwear․ Proper fit guarantees a more enjoyable and long-lasting ownership experience‚ aligning with Minnetonka’s commitment to comfort and style․

Men’s Size Guide

Minnetonka offers a comprehensive men’s size chart‚ converting US‚ UK‚ EU‚ and JP sizes․ This guide ensures accurate fit and comfort‚ helping you choose the perfect size effortlessly․

Understanding Men’s Shoe Size Chart

Minnetonka’s men’s shoe size chart provides a clear conversion between US‚ UK‚ EU‚ and JP sizes‚ ensuring a precise fit․ The chart starts at size 6 (US)‚ corresponding to 39 (EU) and 24 (JP); Each increment represents a gradual increase in length and width․ For half sizes‚ the guide recommends sizing down for styles only available in full sizes․ This system ensures comfort and consistency across all Minnetonka footwear‚ making it easy to find your perfect size and enjoy the durability and style of their high-quality moccasins‚ boots‚ and sandals․

How to Measure Your Foot for the Perfect Fit

To ensure accuracy‚ place your foot flat on a piece of paper and trace its outline․ Measure the longest point (heel to big toe) and the widest part․ Use a ruler to record these lengths․ Compare your measurements to Minnetonka’s size chart‚ which aligns with standard US sizing․ For the best fit‚ consider the thickness of the socks you plan to wear․ If your measurement falls between sizes‚ opt for the next size up to avoid tightness․ This method guarantees a comfortable and precise fit for your Minnetonka footwear․

Converting Men’s Sizes: US‚ UK‚ EU‚ and JP

Accurate size conversion is crucial for the best fit․ Minnetonka’s size chart provides clear conversions for men’s sizes across US‚ UK‚ EU‚ and JP standards․ For example‚ a US size 6 corresponds to UK 5‚ EU 39‚ and JP 24‚ while a US size 13 aligns with UK 12‚ EU 46‚ and JP 31․ The chart ensures consistency‚ allowing you to easily find your size in any region; When ordering‚ measure your foot and compare it to the chart for precise conversions․ This guide helps avoid sizing errors‚ ensuring your Minnetonka footwear fits perfectly‚ no matter the region․

Tips for Choosing the Right Men’s Size

For the best fit‚ measure your foot in the afternoon‚ as feet tend to swell slightly during the day․ Use Minnetonka’s size chart to compare your measurements․ If you normally wear a half size‚ opt for the next full size down‚ as Minnetonka styles often run true to size․ Consider the thickness of your socks‚ as this can affect comfort․ If unsure‚ refer to customer reviews for specific styles‚ as some may fit snugger or looser․ Always double-check the size chart and contact customer support if you’re still unsure for a perfect fit․

Women’s Size Guide

Use Minnetonka’s size chart to find your perfect fit․ If you wear a half size‚ consider sizing down․ Measure your foot for accurate sizing․

Women’s Shoe Size Chart Explained

Minnetonka’s women’s shoe size chart offers a detailed guide to ensure the perfect fit․ The chart includes US‚ UK‚ EU‚ and JP sizes‚ allowing easy conversion․ For example‚ a US size 4 corresponds to a UK size 2 and an EU size 35․ The chart also provides measurements in inches and centimeters‚ helping you choose the right size based on your foot length․ If you wear a half size‚ Minnetonka recommends sizing down for styles available only in full sizes․ This ensures comfort and a secure fit across all footwear styles‚ from moccasins to sandals․

How to Determine Your Women’s Shoe Size

To determine your women’s shoe size‚ start by measuring your foot․ Place your foot flat on the ground and measure its length and width using a ruler․ Compare these measurements to Minnetonka’s size chart․ For the best fit‚ stand barefoot on a flat surface and measure the longest part of your foot․ If you typically wear a half size‚ Minnetonka recommends sizing down in their chart․ This ensures a comfortable fit‚ especially for styles available only in full sizes․ Accurate measurements are key to finding your perfect size and enjoying the comfort of Minnetonka footwear․

US‚ UK‚ EU‚ and JP Size Conversions for Women

Minnetonka offers a detailed size conversion chart for women’s footwear‚ ensuring a perfect fit across regions․ US sizes range from 4 to 11‚ corresponding to UK sizes 2 to 9‚ EU sizes 35 to 42‚ and JP sizes 21 to 28․ For example‚ a US size 7 matches a UK size 5‚ EU size 38‚ and JP size 24․ Refer to the official Minnetonka size chart for accurate conversions․ This guide helps women choose the right size‚ whether shopping in the US‚ UK‚ Europe‚ or Japan‚ ensuring comfort and style in every pair of Minnetonka footwear․

Women’s Sizing Tips for Minnetonka Footwear

For the best fit‚ measure your feet accurately and refer to Minnetonka’s size chart․ Consider ordering your regular shoe size‚ but note that moccasins may stretch slightly over time․ If you wear a half size‚ size down for styles available only in full sizes․ Ensure proper toe room by trying shoes in the afternoon‚ as feet tend to swell․ For wide or narrow feet‚ opt for styles with adjustable laces or straps․ Seasonal footwear‚ like boots or sandals‚ may fit differently‚ so check specific sizing tips for each style․ If unsure‚ consult customer support or reviews for guidance․

Kids’ and Infant Size Guide

Minnetonka’s Kids’ and Infant Size Guide offers age-based estimates for footwear․ Sizes are approximate‚ as growth rates vary․ Use your child’s regular shoe size for accuracy․

Understanding Kids’ and Infant Shoe Sizes

Minnetonka’s Kids’ and Infant shoe sizes are based on age estimates‚ with sizes ranging from newborn to youth․ Infant sizes include 0-3 months and 3-6 months‚ while kids’ sizes align with standard youth sizes․ The size chart provides a guide‚ but fit may vary due to individual growth rates․ For accuracy‚ parents are advised to measure their child’s foot or use their known shoe size․ This ensures comfort and proper fit in Minnetonka’s moccasins‚ boots‚ and sandals designed for children․

How to Measure Your Child’s Foot

To ensure the best fit‚ measure your child’s foot accurately․ Place the foot flat on a piece of paper and trace the outline․ Use a ruler to measure the longest and widest points․ Compare these measurements to Minnetonka’s size chart for kids․ For infants‚ sizes are based on age estimates‚ but measuring ensures accuracy․ Repeat the process for both feet‚ as sizes may differ slightly․ This method helps determine the perfect fit for Minnetonka moccasins‚ boots‚ or sandals‚ ensuring comfort and proper support for growing feet․

Age-Based Sizing for Kids and Infants

Minnetonka size charts for kids and infants are based on age estimates‚ with sizes ranging from newborn to youth․ Infant sizes include newborn (0-3 months)‚ 3-6 months‚ and 6-12 months․ Kids’ sizes are divided into toddler and youth categories․ While these age-based sizes are helpful‚ foot growth rates vary‚ so measuring is recommended․ For the best fit‚ use the child’s regular shoe size if known․ This age-based system provides a general guide‚ but actual foot measurements ensure accuracy and comfort for Minnetonka moccasins‚ boots‚ and sandals‚ catering to growing feet at every stage․

Tips for Choosing the Right Size for Children

Ensure the best fit for kids by measuring their feet accurately and consulting Minnetonka’s size chart․ Consider the footwear type‚ as boots and sandals fit differently․ Allow room for growth‚ especially for toddlers‚ whose feet develop quickly․ If unsure‚ compare with current well-fitting shoes․ Use age-based sizing as a guide but prioritize actual foot measurements․ For conversions‚ refer to the provided charts․ Double-check the fit before purchase‚ and contact customer support for personalized advice․ This ensures comfort and durability for Minnetonka moccasins‚ boots‚ and sandals‚ catering to children’s unique needs and active lifestyles․

Understanding Minnetonka Size Charts

Minnetonka size charts are comprehensive guides for men‚ women‚ and kids‚ offering US‚ UK‚ EU‚ and JP conversions․ Measure foot length and match it to the chart for an accurate fit․

How to Read Minnetonka Size Charts

To read Minnetonka size charts‚ start by identifying your foot length in inches or centimeters․ Match this measurement to the corresponding size on the chart․ For men and women‚ sizes are listed in US‚ UK‚ EU‚ and JP standards․ Children’s sizes are often based on age but align with standard footwear sizing․ Ensure accurate fit by considering width and style-specific features․ Use the provided conversions to switch between regions if necessary․ Always refer to the official Minnetonka guides for precise measurements and conversions to find your perfect fit every time․

Importance of Accurate Foot Measurements

Accurate foot measurements are crucial for ensuring a comfortable and proper fit in Minnetonka footwear․ Ill-fitting shoes can lead to discomfort‚ blisters‚ or even long-term foot issues․ Minnetonka’s size charts are designed to provide precise fit guidance‚ but they rely on correct foot measurements․ Measure your feet at the end of the day‚ as feet tend to swell․ Use a ruler or a Brannock device to get exact lengths․ For children‚ regular measurements are essential due to rapid growth․ Proper sizing ensures optimal comfort‚ support‚ and the ability to enjoy Minnetonka’s high-quality footwear for years to come․

How Minnetonka Sizes Compare to Other Brands

Minnetonka sizes generally align with standard footwear sizing‚ making it easy to transition from other brands․ However‚ their moccasins and soft-soled styles may offer a slightly roomier fit․ Customers often find that their regular shoe size works well for Minnetonka footwear․ For half sizes‚ Minnetonka recommends sizing down if the desired style is only available in full sizes․ This ensures a comfortable fit without excessive space․ Minnetonka’s size charts are consistent with US‚ UK‚ EU‚ and JP standards‚ making conversions straightforward․ Overall‚ Minnetonka’s sizing remains reliable and comparable to other brands‚ providing a consistent fit across their product range․

Special Considerations for Minnetonka Sizing

Minnetonka sizing offers unique considerations‚ such as half-size adjustments and style-specific fits․ Ensure accuracy by consulting size charts and measuring guides for optimal comfort and precision․

Half Sizes: What You Need to Know

Minnetonka half sizes are essential for achieving the perfect fit․ If a style is only available in full sizes‚ Minnetonka recommends sizing down by a half size for the best comfort․ For example‚ if you typically wear an 8․5‚ opt for a size 8․ This ensures a snug yet comfortable fit‚ as their footwear is designed to be roomy․ When half sizes are available‚ stick to your regular size for optimal results․ Proper sizing is crucial for long-lasting comfort‚ especially in moccasins and slippers‚ which are known for their soft‚ moldable designs․

Wide Feet and Narrow Feet: Finding the Right Fit

Minnetonka footwear offers styles to accommodate both wide and narrow feet․ For wide feet‚ opt for styles with adjustable laces or straps for a customizable fit․ Moccasins‚ with their soft‚ flexible design‚ are ideal for wider feet․ For narrow feet‚ snug-fitting styles like slippers or boots with good arch support are recommended․ Measure your foot accurately to ensure the best fit․ If unsure‚ consider the width options available in specific styles․ Minnetonka’s sizing guide helps you find comfort and style‚ regardless of foot shape․

Seasonal Sizing: Boots vs․ Sandals vs․ Slippers

Seasonal footwear requires tailored sizing approaches․ For boots‚ consider thicker socks for colder months‚ potentially sizing up for comfort․ Sandals typically fit snugger‚ so opt for your standard size․ Slippers‚ designed for relaxation‚ may run larger‚ allowing for cozy layering․ Measure your feet for accuracy‚ as seasonal styles vary in fit․ Use Minnetonka’s size charts to guide your selection‚ ensuring the perfect balance of comfort and style for every season․ Proper sizing ensures optimal performance and comfort‚ whether you’re braving winter or enjoying summer․

Additional Tips for the Best Fit

Measure your feet in the afternoon‚ as they tend to swell slightly․ Consider your foot shape and toe room for optimal comfort․ Check material stretch and reviews for added insights․

How to Ensure the Perfect Fit When Ordering Online

To ensure the perfect fit when ordering Minnetonka footwear online‚ start by accurately measuring your feet using a size chart․ Compare your measurements to the chart and consider factors like toe room and foot shape․ Check if the style runs true to size or if it’s known to stretch․ Read customer reviews for insights into fit and comfort․ If you’re unsure‚ opt for a slightly larger size to accommodate foot swelling․ For the best results‚ try shoes on in the afternoon‚ as feet tend to swell throughout the day․ This approach ensures a comfortable and stylish fit from Minnetonka․

Common Mistakes to Avoid When Choosing a Size

When selecting your Minnetonka size‚ avoid guessing your size without measuring․ Assuming your size hasn’t changed can lead to poor fit․ Don’t ignore half sizes‚ as they significantly impact comfort․ Overlooking style-specific sizing‚ like boots vs․ sandals‚ is another common error․ Don’t rely solely on previous purchases‚ as sizes can vary between styles․ Lastly‚ avoid ordering too early in the day‚ as feet tend to swell․ By measuring accurately and consulting the size chart‚ you can avoid these mistakes and ensure a comfortable‚ perfect fit for your Minnetonka footwear․

Resources and Support

Minnetonka offers official size charts and guides for men‚ women‚ and kids․ Visit their website or contact customer support at 520-457-3465 for sizing assistance․

Additional resources include product care tips‚ FAQs‚ and measurement guides to ensure the best fit for your footwear needs․

Customer Support for Sizing Questions

Minnetonka provides exceptional customer support to address sizing inquiries․ Their team is available to assist with size conversions‚ fit recommendations‚ and general questions․ For immediate help‚ call 520-457-3465 or visit their official website for detailed size charts and guides․ Additionally‚ resources like measurement guides and FAQs are accessible online‚ ensuring you find the perfect fit effortlessly․ Whether you’re shopping for moccasins‚ boots‚ or sandals‚ Minnetonka’s support ensures a seamless and confident purchasing experience․

Official Minnetonka Size Charts and Guides

Minnetonka provides official size charts and guides for men‚ women‚ and children‚ ensuring accurate measurements and conversions․ Their website features detailed size charts for US‚ UK‚ EU‚ and JP sizes‚ along with tips for measuring your foot․ The charts cater to various footwear types‚ including moccasins‚ boots‚ and sandals․ For the best fit‚ Minnetonka recommends using their measurement guide to determine your size before ordering․ Additionally‚ they offer helpful resources like conversion tables and style-specific fitting tips to ensure comfort and satisfaction with your purchase․

Minnetonka’s size guide ensures a perfect fit for all footwear styles․ Use their charts and tips to find your ideal size and enjoy comfort and confidence in every step․

Final Tips for a Perfect Fit

For the best fit‚ measure your feet in the afternoon‚ as they tend to swell during the day․ Use Minnetonka’s size charts to convert sizes across regions․ If you’re a half-size‚ opt for the next full size down for styles without half sizes․ Consider the width of your feet and choose styles that accommodate your foot shape․ Try shoes on with the same socks you plan to wear․ Don’t hesitate to contact customer support for sizing questions․ Finally‚ check the return policy to ensure you can exchange sizes if needed․ A perfect fit guarantees comfort and style!

blendtec smoothie recipe book pdf

The Blendtec Smoothie Recipe Book offers a wide variety of delicious and healthy smoothie recipes‚ designed to maximize flavor and nutrition․ Perfect for beginners and experienced blenders alike‚ it provides easy-to-follow instructions and creative combinations to elevate your smoothie game․ With a focus on using fresh‚ wholesome ingredients‚ this guide helps you create quick‚ nutritious‚ and mouthwatering smoothies tailored to your dietary preferences․ Whether you’re aiming for weight management‚ boosting energy‚ or exploring vegan and keto options‚ this book is your go-to resource for smoothie perfection․

Overview of the Blendtec Smoothie Recipe Book

The Blendtec Smoothie Recipe Book is a comprehensive guide packed with diverse‚ easy-to-make smoothie recipes tailored for health-conscious individuals․ It features a wide range of options‚ from classic blends to specialty recipes like keto‚ vegan‚ and seasonal treats․ Designed to complement Blendtec blenders‚ the book emphasizes nutrient-rich ingredients and simple preparation methods․ Whether you’re seeking quick breakfast ideas‚ post-workout recovery drinks‚ or delicious desserts‚ this guide offers something for everyone․ With clear instructions and creative combinations‚ it helps users unlock the full potential of their Blendtec blender while exploring new flavors and dietary preferences․ Perfect for both beginners and experienced smoothie enthusiasts․

Why Choose Blendtec for Smoothie Recipes?

Blendtec stands out as a top choice for smoothie enthusiasts due to its high-performance blenders and comprehensive recipe resources․ Their smoothie recipe book‚ available as a PDF‚ offers a wide variety of creative and nutritious recipes designed to maximize the capabilities of Blendtec blenders․ With pre-programmed smoothie cycles and durable‚ BPA-free jars‚ Blendtec ensures consistent results․ The brand’s commitment to innovation and quality makes it a trusted name for crafting smoothies that are both delicious and healthy․ By choosing Blendtec‚ users gain access to a seamless blending experience and a wealth of recipe options tailored to their dietary needs and preferences‚ making it easier to achieve their wellness goals․

Key Features of the Blendtec Smoothie Recipe Book

The Blendtec Smoothie Recipe Book offers a diverse collection of smoothie recipes‚ step-by-step guides‚ and customization tips‚ ensuring compatibility with Blendtec blenders for optimal results․

Unique Aspects of the Recipe Book

The Blendtec Smoothie Recipe Book stands out for its user-friendly design and compatibility with Blendtec blenders‚ offering pre-programmed smoothie cycles for effortless blending․ It features a wide range of customizable recipes‚ catering to diverse dietary needs like vegan‚ keto‚ and dairy-free options․ The book includes step-by-step guides‚ tips for ingredient selection‚ and innovative combinations to enhance flavor and nutrition․ Its focus on versatility allows users to experiment with various fruits‚ vegetables‚ and superfoods‚ ensuring endless creativity․ Additionally‚ it provides insights into maximizing the potential of your Blendtec blender‚ making it a comprehensive resource for smoothie enthusiasts seeking both simplicity and sophistication in their recipes․

Types of Smoothie Recipes Included

The Blendtec Smoothie Recipe Book offers an extensive variety of smoothie recipes‚ catering to different tastes and dietary preferences․ Classic smoothies are a staple‚ blending timeless combinations of fruits and yogurt for a traditional treat․ Specialty options include keto‚ vegan‚ and dairy-free recipes‚ ensuring inclusivity for all lifestyles․ Seasonal and holiday-themed smoothies add a festive touch‚ using ingredients like pumpkin for fall or berries for summer․ Whether you’re in the mood for something familiar or adventurous‚ the book provides diverse choices‚ each designed to be both nutritious and flavorful․ This diversity makes it a versatile guide for anyone looking to enjoy smoothies year-round․

Benefits of Using the Blendtec Recipe Book

The Blendtec Smoothie Recipe Book provides a comprehensive guide to creating nutrient-rich‚ flavorful smoothies with ease․ It offers a wide variety of recipes tailored to different dietary needs‚ helping users maintain a balanced and healthy lifestyle․ The book simplifies meal prep‚ saving time while ensuring delicious and nutritious outcomes․ With tips on ingredient selection and blending techniques‚ it empowers users to experiment and customize recipes to their preferences․ Additionally‚ the guide supports weight management and wellness goals by incorporating fresh‚ wholesome ingredients․ By using this book‚ users can enhance their culinary skills‚ explore new flavors‚ and enjoy the convenience of healthy smoothies anytime‚ making it a valuable resource for home cooks and health enthusiasts alike․

Popular Smoothie Recipes from the Blendtec Book

Discover Berry Blitz‚ tropical green smoothies‚ and protein-packed blends‚ offering vibrant flavors and nutrients․ Explore keto‚ vegan‚ and seasonal options tailored to every taste and dietary need․

Classic Blendtec Smoothie Recipes

The Blendtec Smoothie Recipe Book features timeless favorites like the Strawberry Classic and Tropical Green․ These recipes blend fresh fruits‚ yogurt‚ and milk for a perfect balance of flavor and nutrition․ Simple yet satisfying‚ they offer a delicious way to start your day or recharge midday․ With minimal ingredients and easy steps‚ classic smoothies are ideal for quick preparation․ Customize them with your favorite fruits or add a boost of protein for extra energy․ These tried-and-true blends are versatile‚ catering to various tastes and dietary preferences․ Perfect for both novices and experienced blenders‚ they showcase the ease and versatility of creating smoothies with Blendtec․

Specialty Smoothies (Keto‚ Vegan‚ etc․)

The Blendtec Smoothie Recipe Book offers a variety of specialty smoothies catering to specific dietary needs‚ such as keto and vegan preferences․ For keto enthusiasts‚ recipes like the “Keto Berry Boost” combine fresh berries‚ avocado‚ and coconut oil for a low-carb‚ high-fat blend․ Vegan options‚ such as the “Vegan Tropical Temptation‚” showcase plant-based ingredients like mango‚ pineapple‚ and coconut milk․ These recipes are carefully crafted to meet dietary restrictions while delivering vibrant flavors and essential nutrients․ Whether you’re following a keto lifestyle or adhering to vegan principles‚ Blendtec’s specialty smoothies ensure you can enjoy delicious‚ tailored blends without compromise․ These recipes highlight the versatility of Blendtec blenders in creating unique and satisfying smoothies for all dietary preferences․

Seasonal and Holiday-Themed Smoothies

The Blendtec Smoothie Recipe Book includes a delightful selection of seasonal and holiday-themed smoothies‚ perfect for celebrating special occasions․ From summer refreshers like the “Strawberry Sunshine Smoothie” to winter warmers such as the “Cranberry Spice Blend‚” these recipes capture the essence of each season․ Holiday-inspired options like the “Gingerbread Delight” or “Pumpkin Pie Smoothie” add a festive touch to your blender creations․ These unique blends are crafted to incorporate fresh‚ in-season ingredients‚ ensuring maximum flavor and nutrition․ Whether it’s a refreshing summer treat or a cozy winter warmer‚ Blendtec’s seasonal smoothies offer a creative way to enjoy the flavors of the year-round․ The pre-programmed Smoothie cycle ensures perfect results every time․

How to Use the Blendtec Blender for Smoothies

Press the pre-programmed Smoothie cycle for seamless blending․ Add liquid first‚ then ingredients‚ and blend until smooth․ Use frozen items for thicker‚ colder smoothies․

Understanding the Smoothie Pre-Programmed Cycle

The Blendtec blender features a Smoothie pre-programmed cycle designed for perfect results․ Press the button‚ and the blender automatically adjusts speed and duration for optimal blending․ Add liquid first‚ followed by solids‚ and let the cycle work․ It ensures a smooth consistency by pulsing and increasing speed gradually․ For thicker smoothies‚ use frozen ingredients․ The cycle stops automatically when done‚ saving time and effort․ This feature ensures consistent results every time‚ making it easy to create professional-quality smoothies at home․ Experiment with ingredients and enjoy hassle-free blending with Blendtec’s innovative technology․

Best Practices for Blending Smoothies

For the perfect smoothie‚ start by adding liquid first‚ such as milk or yogurt‚ followed by solids like fruits‚ vegetables‚ and ice․ This ensures efficient blending and prevents motor strain․ Use frozen ingredients for thicker‚ colder smoothies․ Avoid overloading the blender‚ as this can affect performance․ Experiment with layering ingredients to achieve desired textures․ If blending tough items like seeds or ice‚ use the pulse function first to break them down․ Scrape the sides if needed for even blending․ Don’t over-blend‚ as it can make smoothies too thin․ Taste and adjust sweetness or consistency before finalizing․ Clean the blender immediately for easier maintenance․ These practices ensure smooth‚ delicious results every time․

Health Benefits of Blendtec Smoothies

Blendtec smoothies are packed with nutrients‚ vitamins‚ and minerals‚ boosting energy‚ supporting immunity‚ and promoting healthy digestion․ They’re ideal for weight management and overall well-being․

Nutritional Value of Blendtec Smoothies

Blendtec smoothies are nutrient-packed‚ offering a rich blend of vitamins‚ minerals‚ and antioxidants from fresh fruits‚ vegetables‚ and whole foods․ The even blending action ensures maximum nutrient extraction‚ preserving the natural goodness of ingredients․ These smoothies are high in fiber‚ vitamins A and C‚ potassium‚ and plant-based proteins‚ making them a healthy choice for boosting immunity and energy․ With customizable options‚ users can incorporate superfoods‚ nuts‚ or seeds for added nutrition․ The ability to use whole ingredients‚ including stems and peels‚ ensures no nutrient is wasted․ This makes Blendtec smoothies a wholesome and filling option‚ perfect for supporting weight management and overall well-being․

Weight Management and Health Trends

Blendtec smoothies are a popular choice for those focusing on weight management and health trends like keto‚ vegan‚ and low-carb diets․ By using nutrient-dense ingredients‚ these smoothies support healthy weight loss while providing essential vitamins and minerals․ The ability to incorporate superfoods and plant-based proteins makes them ideal for modern dietary preferences․ Many users find that Blendtec smoothies help with portion control and reduce cravings for unhealthy snacks․ With customizable recipes‚ it’s easy to align smoothies with current health trends‚ ensuring they fit seamlessly into your lifestyle․ Whether you’re aiming to lose weight or simply maintain a balanced diet‚ Blendtec smoothies offer a delicious and nutritious solution․

Downloading and Accessing the Blendtec Smoothie Recipe Book

The Blendtec Smoothie Recipe Book is available as a free PDF download‚ easily accessible online․ Visit Blendtec’s official website or authorized sources to download and enjoy recipes instantly․

Where to Find the Blendtec Smoothie Recipe Book PDF

The Blendtec Smoothie Recipe Book PDF can be easily found on Blendtec’s official website or authorized recipe platforms․ Visit the Blendtec website and navigate to their recipe section for a free download․ Additionally‚ it may be available on popular recipe-sharing sites or forums․ Some users have shared the PDF on platforms like Google Drive or similar services․ Always ensure you download from trusted sources to avoid unauthorized or outdated versions․ Searching with keywords like “Blendtec Smoothie Recipe Book PDF download” can help locate the file quickly․ For the most reliable access‚ check Blendtec’s official resources first to enjoy the complete collection of recipes․

How to Use the Digital Recipe Guide Effectively

To make the most of the Blendtec Smoothie Recipe Book PDF‚ start by exploring its organized categories‚ such as classic smoothies‚ keto options‚ and seasonal blends․ Bookmark or highlight recipes that suit your dietary preferences for quick access․ Experiment with ingredients by substituting fruits or adding superfoods to tailor recipes to your taste․ Utilize the pre-programmed smoothie cycle on your Blendtec blender for consistent results․ Keep the guide handy on your tablet or phone for easy reference while blending․ Regularly revisit the guide to discover new flavors and stay inspired․ This digital format allows for easy updates and access to the latest recipes‚ ensuring your smoothie game remains fresh and exciting year-round․

Blendtec Blender Models and Compatibility

The Blendtec Smoothie Recipe Book is compatible with all Blendtec blender models‚ including the Professional 800 and Designer 650․ It complements the blender’s advanced features‚ ensuring smooth results every time․

Overview of Blendtec Blender Models

Blendtec offers a range of high-performance blenders designed for home and professional use․ Models like the Professional 800‚ Designer 650‚ and Classic 575 feature advanced motor technology and pre-programmed blending cycles․ These blenders are known for their durability‚ powerful motors‚ and BPA-free jars․ The FourSide Jar and WildSide+ Jar are popular choices‚ offering efficient blending and easy cleanup․ Each model is built to handle tough ingredients‚ from frozen fruits to leafy greens‚ ensuring smooth and consistent results․ Whether you’re making smoothies‚ soups‚ or batters‚ Blendtec blenders are versatile tools for every kitchen task․

Ensuring Compatibility with Your Blender

To ensure compatibility with your Blendtec blender‚ it’s important to refer to the user manual and recipe book specific to your model․ Blendtec offers a variety of blenders‚ such as the Professional 800‚ Designer 650‚ and Classic 575‚ each with unique features like pre-programmed cycles and jar designs․ The FourSide Jar and WildSide+ Jar are designed for optimal blending performance․ Always check the compatibility of attachments and accessories with your specific model․ Using the correct jar and settings ensures smooth operation and prevents damage․ Additionally‚ the pre-programmed smoothie cycle on many models simplifies the blending process‚ guaranteeing perfect results every time․ This ensures your smoothie recipes turn out as intended‚ making your blending experience seamless and enjoyable․

The Blendtec Smoothie Recipe Book is a comprehensive guide to creating delicious‚ healthy smoothies․ With its diverse recipes and user-friendly design‚ it enhances your blending experience‚ ensuring nutritional benefits and flavor in every sip․ Perfect for all blender models‚ it offers endless possibilities for crafting your favorite smoothies effortlessly․

Final Thoughts on the Blendtec Smoothie Recipe Book

statistics project examples pdf

Statistics project examples in PDF format provide practical insights into analyzing data, creating visualizations, and drawing meaningful conclusions․ They often include real-world applications in education, healthcare, and finance, demonstrating how statistical methods can solve complex problems․ These examples are invaluable for learners seeking to understand data interpretation and decision-making processes․

Overview of Statistics Projects

Statistics projects involve the collection, analysis, and interpretation of data to address specific questions or hypotheses․ These projects often apply descriptive and inferential statistical methods to real-world scenarios, providing insights into patterns, trends, and correlations․ Examples include analyzing student performance in education, patient outcomes in healthcare, or market trends in business․ By using tools like Excel, R, or Python, statisticians can visualize data, conduct hypothesis tests, and draw meaningful conclusions․ Such projects are essential for making data-driven decisions and solving complex problems across various industries․

Importance of Using PDF Examples

PDF examples of statistics projects serve as valuable learning tools, offering structured guidance and practical insights․ They provide clear illustrations of how to apply statistical methods to real-world data, making complex concepts more accessible․ These examples often include step-by-step analyses, visualizations, and interpretations, helping learners understand how to formulate hypotheses, conduct tests, and draw conclusions․ PDFs are also easily shareable and accessible, making them ideal for educational purposes․ They enable users to study successful projects and adapt techniques for their own research, fostering a deeper understanding of statistical principles and their applications․

Common Types of Statistics Projects

Statistics projects typically fall into categories like descriptive or inferential, focusing on data analysis, visualization, and interpretation․ These types help identify patterns, test hypotheses, and inform decision-making processes․

Descriptive Statistics Projects

Descriptive statistics projects focus on summarizing and presenting data to understand basic features․ They often involve calculating measures of central tendency (mean, median) and variability (range, standard deviation)․ These projects use tools like Excel, R, or Python to create visualizations such as bar charts, histograms, and box plots․ Examples include analyzing student performance, healthcare outcomes, or business sales data․ The goal is to provide clear, concise insights into data distributions and trends, making complex information accessible for decision-making․

Inferential Statistics Projects

Inferential statistics projects involve drawing conclusions about a population based on sample data․ Techniques like hypothesis testing, confidence intervals, and regression analysis are commonly used․ These projects often explore relationships between variables or predict future trends․ Examples include analyzing customer behavior, medical treatment efficacy, or economic factors․ Tools like R, Python, or Excel are frequently utilized to perform complex calculations and model data․ Inferential statistics projects are essential for making informed decisions by generalizing findings from a sample to a larger population, ensuring actionable insights․

Sample Statistics Project Ideas

Explore diverse project ideas across education, healthcare, and business sectors․ Analyze data to identify trends, predict outcomes, or compare groups using regression, hypothesis testing, or correlation methods effectively․

Education Sector Statistics Projects

Statistics projects in education often analyze student performance, teacher effectiveness, and socioeconomic impacts on learning․ Examples include studying grade trends over time, comparing test scores across regions, or assessing the influence of extracurricular activities on academic success․ These projects may use regression analysis to predict student outcomes or hypothesis testing to evaluate program effectiveness․ By leveraging data from schools, surveys, or standardized tests, educators can identify patterns and make data-driven decisions to improve educational strategies and resource allocation, ultimately enhancing student success and institutional performance․

Healthcare and Medical Statistics Projects

Healthcare statistics projects often focus on patient outcomes, disease trends, and treatment efficacy․ Examples include analyzing mortality rates, comparing drug effectiveness, or predicting readmission probabilities using predictive analytics․ Researchers might use regression analysis to identify risk factors for chronic diseases or hypothesis testing to evaluate vaccine efficacy․ Survival analysis is common in oncology studies to assess treatment impacts․ These projects rely on data from clinical trials, patient records, or public health databases, enabling healthcare professionals to make informed decisions and improve care quality while optimizing resource allocation and patient outcomes effectively․

Business and Finance Statistics Projects

Business and finance statistics projects involve analyzing financial data to uncover trends and patterns․ Common examples include studying stock price fluctuations, forecasting revenue, and assessing market risks․ Projects may use regression analysis to predict consumer spending or hypothesis testing to evaluate investment strategies․ Data visualization tools like Excel or Python are often employed to present insights clearly․ These projects help organizations optimize operations, make informed decisions, and improve profitability․ By leveraging statistical methods, businesses can gain a competitive edge and drive sustainable growth in dynamic markets․

Environmental Science Statistics Projects

Environmental science statistics projects focus on analyzing data related to climate change, air quality, and wildlife populations; Examples include studying temperature trends over decades or assessing the impact of pollution on ecosystems․ Projects often use regression analysis to predict future environmental changes․ Data is typically collected from field measurements, satellite imagery, or government databases․ Statistical tools like R or Python are employed for analysis․ Visualizations, such as heat maps or line graphs, help communicate findings․ These projects aim to inform policy decisions, promote sustainability, and address critical environmental challenges effectively․

Data Collection and Analysis Methods

Data collection involves gathering primary data through surveys, experiments, or observations and secondary data from existing sources․ Analysis methods include statistical techniques like regression, hypothesis testing, and visualization․

Primary Data Collection Techniques

Primary data collection involves gathering original data directly from sources․ Common techniques include surveys, interviews, experiments, and observations․ Surveys are widely used for collecting self-reported information, while interviews provide in-depth insights․ Experiments allow for controlled testing of variables, and observations enable researchers to collect data in natural or controlled settings․ These methods ensure data accuracy and relevance, making them essential for various statistics projects․ Proper execution of these techniques is crucial for reliable results․

Secondary Data Sources and Tools

Secondary data sources include pre-existing information from government reports, academic journals, industry studies, and online databases․ Tools like Google Scholar, JSTOR, and government websites provide access to extensive datasets․ These sources are cost-effective and time-saving, as the data is already collected․ However, verifying the credibility and relevance of secondary data is crucial for accurate analysis․ Common tools for accessing secondary data include statistical software like Excel, R, and Python libraries, which facilitate efficient data manipulation and analysis for statistics projects․

Statistical Tools and Software

Popular tools for statistical analysis include Excel, R, Python, and SPSS․ These software options enable data visualization, modeling, and hypothesis testing, essential for comprehensive statistics projects․

Using Excel for Statistical Analysis

Excel is a versatile tool for statistical analysis, offering functions like AVERAGE, STDEV, and CORREL․ Its data visualization features, such as charts and pivot tables, simplify complex data interpretation․ Add-ins like Analysis ToolPak enhance capabilities for regression and hypothesis testing․ Many statistics project examples in PDFs demonstrate Excel’s accessibility for descriptive and inferential analytics․ Templates and tutorials are widely available, making it a popular choice for students and professionals alike to perform robust statistical analyses efficiently․

R Programming for Advanced Statistics

R programming is a powerful tool for advanced statistical analysis, offering extensive libraries like dplyr and tidyr for data manipulation․ Functions such as lm enable linear regression, while caret and dplyr support machine learning tasks․ R’s flexibility in data visualization through ggplot2 makes it ideal for creating informative graphs․ These features, along with its open-source nature, make R a preferred choice for data scientists and researchers, facilitating complex tasks like hypothesis testing and predictive modeling with precision and efficiency․

Data Visualization in Statistics Projects

Data visualization transforms complex data into clear, interpretable insights, using charts, graphs, and plots․ Tools like Tableau and Power BI enhance understanding, making patterns and trends evident in statistics projects․

Best Practices for Creating Charts and Graphs

When crafting charts and graphs, clarity and accuracy are paramount․ Ensure labels are concise, axes are properly scaled, and colors are used judiciously to avoid confusion․ Avoid 3D effects that can distort data perception․ Use consistent formatting across visuals to maintain coherence․ Interactive tools like Tableau or Power BI allow dynamic data exploration, enhancing understanding․ Always align the visualization type with the data story being told, whether it’s trends, comparisons, or distributions․ Properly citing data sources adds credibility to your work․ Regularly review and refine your visuals for optimal impact․

Using Tools Like Tableau or Power BI

Tools like Tableau and Power BI are essential for creating dynamic and interactive visualizations in statistics projects․ They enable users to connect to various data sources, build dashboards, and explore data in real-time․ These platforms offer intuitive drag-and-drop interfaces, making it easier to create complex visualizations without extensive coding knowledge․ Features like data storytelling and collaboration tools enhance the sharing of insights․ By leveraging these tools, statisticians can transform raw data into actionable information, fostering better decision-making and clearer communication of results in PDF project examples․

CRISP-DM Methodology for Statistics Projects

CRISP-DM offers a structured framework for statistics projects, ensuring alignment with business objectives through systematic data analysis and modeling, fostering reliable outcomes and actionable insights․

Business Understanding Phase

The business understanding phase involves defining project objectives and identifying key stakeholders․ It requires understanding the organization’s goals, challenges, and expectations to align statistical analysis with business needs․ This phase ensures that the project addresses relevant problems and delivers actionable insights․ By engaging stakeholders and establishing clear objectives, the foundation for successful data analysis is laid, guiding subsequent phases effectively․

Data Understanding and Preparation

Data understanding and preparation involve exploring datasets to identify patterns, anomalies, and relationships․ This phase ensures data quality by cleaning, transforming, and formatting it for analysis․ Key activities include handling missing values, removing duplicates, and converting data types․ Proper preparation is crucial for accurate statistical modeling and meaningful insights․ Tools like Excel or Python are often used to streamline these processes, making data ready for advanced analysis in statistics projects․

Machine Learning Integration in Statistics

Machine learning enhances statistical analysis by automating pattern recognition and predictive modeling․ Techniques like regression and clustering integrate seamlessly, offering deeper insights into complex datasets and real-world applications․

Supervised Learning Applications

Supervised learning is widely applied in statistics projects for predicting outcomes based on labeled data․ Common examples include regression models for forecasting sales or classification tasks like customer churn prediction; These methods leverage historical data to train algorithms, enabling accurate predictions․ In healthcare, supervised learning aids in disease diagnosis, while in finance, it helps detect fraudulent transactions․ By utilizing labeled datasets, supervised learning enhances predictive accuracy, making it a cornerstone of modern statistical analysis and decision-making processes across various industries․

Unsupervised Learning Techniques

Unsupervised learning techniques are used to identify patterns or intrinsic structures in unlabeled data․ Common applications include clustering (e․g․, k-means) for customer segmentation and dimensionality reduction (e․g․, PCA) for simplifying complex datasets․ These methods are invaluable in exploratory data analysis, helping uncover hidden relationships without prior assumptions․ For instance, in market analysis, unsupervised learning can group similar consumer behaviors, aiding in targeted marketing strategies․ These techniques are essential for uncovering insights in datasets where predefined labels are unavailable, making them a powerful tool in statistical projects․

Real-World Applications of Statistics

Real-world applications of statistics include predictive analytics in retail and quality control in manufacturing, enabling data-driven decision-making and problem-solving across industries․

Predictive Analytics in Retail

Predictive analytics in retail leverages statistical models to forecast consumer behavior, optimizing inventory management and personalized marketing strategies․ By analyzing historical sales data and customer preferences, retailers can anticipate demand, reduce overstocking, and enhance profitability․ Advanced techniques like regression analysis and machine learning algorithms enable businesses to identify trends and deliver tailored recommendations, improving customer satisfaction and loyalty․ These insights empower retailers to make data-driven decisions, ensuring efficient operations and a competitive edge in the market․

Quality Control in Manufacturing

Statistical methods play a crucial role in quality control, ensuring manufactured products meet standards and customer expectations․ Techniques like control charts and Six Sigma help detect defects and process variations․ By analyzing data, manufacturers can identify trends, implement corrective actions, and improve production consistency․ These tools reduce waste, enhance reliability, and optimize efficiency․ Quality control statistics are essential for maintaining high product standards and fostering customer satisfaction, making them a cornerstone of modern manufacturing processes and continuous improvement initiatives․

Advanced Topics in Statistics

Advanced statistical topics like time series analysis and survival analysis explore complex data patterns and trends, enabling deeper insights into dynamic systems and event occurrences․

Time Series Analysis

Time series analysis involves studying data points collected over time to identify patterns, trends, and anomalies․ It is widely used in finance, climate science, and economics to forecast future events․ Techniques like ARIMA and SARIMA models help predict trends by analyzing historical data․ Seasonal decomposition and anomaly detection are key components․ Tools like Python and R are commonly used for such analyses․ Understanding temporal relationships enables better decision-making and resource planning․ This method is essential for industries relying on temporal data to optimize operations and strategic planning․

Survival Analysis

Survival analysis examines the duration until an event occurs, such as patient survival or product failure․ It helps identify risk factors and predict outcomes․ Techniques like Kaplan-Meier estimators and Cox proportional hazards models are used to analyze time-to-event data․ Widely applied in healthcare and engineering to understand failure rates and improve reliability․ Tools like R and Python provide robust libraries for implementation, making it essential for real-world applications and informed decision-making․

Best Practices for Statistics Projects

Ensure high-quality data, document processes, and report results clearly․ Use appropriate tools and maintain ethical standards to guarantee accuracy and reproducibility in your statistical work․

Ensuring Data Quality

Ensuring data quality is critical for reliable statistical outcomes․ This involves checking for accuracy, completeness, and consistency․ Use validation techniques to detect errors and handle missing data appropriately․ Regularly clean and preprocess data to maintain integrity․ Document all steps to ensure transparency and reproducibility․ Avoid bias by using representative samples and robust methodologies․ By prioritizing data quality, you enhance the credibility and validity of your statistical analysis, leading to more accurate and actionable insights in your projects․

Documenting and Reporting Results

Documenting and reporting results is essential for communicating findings effectively․ Use clear and concise language, supported by visual aids like charts and graphs․ Organize your report with sections such as introduction, methodology, analysis, and conclusions․ Ensure proper formatting, including tables, lists, and references․ Include an executive summary for quick insights and detailed appendices for raw data․ Maintain transparency by disclosing limitations and assumptions․ Tailor your report to the audience, ensuring technical accuracy for experts and accessibility for non-experts․ This approach enhances credibility and ensures reproducibility of your work․

Resources for Statistics Projects

Explore recommended PDF guides, online communities, and educational platforms for statistics projects․ Utilize tools like Excel, Python, and R for data analysis․ Visit forums and academic sites for insights and templates to enhance your project workflow and accuracy․

Recommended PDF Guides and Templates

Statistics project examples in PDF format offer comprehensive guides and templates to streamline your workflow․ These resources provide step-by-step instructions, sample datasets, and pre-designed templates for data visualization and analysis․ Many guides focus on methodologies like CRISP-DM, ensuring a structured approach to project planning and execution․ Templates for reports, charts, and graphs help present findings professionally․ Additionally, PDF guides often include tips for using tools like Excel, R, and Python, making them invaluable for both beginners and advanced statisticians․ They are easily accessible online and cover a wide range of project types․

Online Communities and Forums

Online communities and forums are excellent resources for statistics project examples and guidance․ Platforms like Kaggle, Stack Overflow, and Reddit host discussions on data analysis, offering insights and shared experiences․ Many forums provide access to downloadable PDF guides, templates, and sample projects․ These spaces foster collaboration, allowing users to ask questions, share challenges, and receive expert advice․ They also serve as hubs for discovering new tools, methodologies, and best practices in statistical analysis․ Engaging with these communities can significantly enhance your project outcomes and learning journey․

frigidaire stove user manual

Safety Instructions

Always follow safety guidelines when using your Frigidaire stove. Ensure proper installation, avoid modifications, and handle errors promptly. Keep flammable materials away and monitor cooking processes closely.

  • Never leave the stove unattended during operation.
  • Keep children away from the stove while in use.
  • Ensure all vents are clear for proper airflow.
  • Do not use the stove if any parts are damaged.

Refer to the official manual for detailed safety protocols.

General Safety Precautions

Always prioritize safety when operating your Frigidaire stove. Ensure proper installation by a certified professional and avoid any modifications to the appliance. Regularly inspect burners, vents, and electrical connections for damage or wear. Keep flammable materials, such as curtains or towels, away from the stove. Never leave cooking unattended, especially when using oil or high heat. Ensure children are supervised and kept at a safe distance. Avoid using the stove if any parts are damaged or malfunctioning. Follow the manufacturer’s guidelines for cookware compatibility to prevent accidents. Clean up spills immediately to avoid slipping hazards. Familiarize yourself with the appliance’s controls and emergency shutdown procedures. Refer to the official manual for detailed safety protocols to ensure safe and efficient operation.

  • Never use abrasive cleaners that could damage surfaces;
  • Ensure proper ventilation to prevent gas or fume buildup.

Specific Safety Warnings

Specific safety warnings for your Frigidaire stove include avoiding the use of unauthorized flame diffusers or burner modifications, as they may compromise safety. Never operate the stove with damaged or altered parts, as this could lead to hazards. Ensure all controls are functioning properly, especially on electronic models, to prevent unintended operation. Do not store flammable materials near the stove or oven. Always ensure the appliance is properly grounded to avoid electric shock. If you notice unusual odors or sounds, discontinue use and contact a certified technician. Never attempt repairs yourself, as this could void the warranty or cause further damage. Always follow the manufacturer’s guidelines for cookware compatibility to prevent overheating or fire risks. Keep the stove surface clean to avoid grease fires. Refer to the manual for specific precautions related to your model.

  • Avoid leaving cooking unattended, especially when using oil.
  • Do not use the stove if it has been damaged or modified.

Handling Common Errors

If your Frigidaire stove encounters an error, refer to the troubleshooting section in the manual. Common issues include faulty sensors, clogged vents, or malfunctioning heating elements. Turn off the stove and unplug it before inspecting for obstructions or damage. For electronic models, ensure the circuit board is functioning correctly; If the oven does not heat, check the power supply and ensure the door is properly closed. Addressing errors promptly prevents further damage. Contact a certified technician if issues persist, as self-repairs may void the warranty. Regular maintenance, such as cleaning sensors and ensuring proper ventilation, helps minimize errors. Always follow the manufacturer’s guidelines for troubleshooting to maintain appliance performance and safety. Timely resolution of errors ensures optimal functionality and longevity of your stove. Keep the user manual handy for quick reference during unexpected issues.

Installation and Setup

Ensure proper installation by following the Frigidaire stove manual. Check electrical connections and ventilation requirements. Level the stove and secure it to prevent movement during use.

Installation Requirements

For a safe and efficient setup, adhere to specific installation guidelines for your Frigidaire stove. Ensure the area is clear of flammable materials and maintain proper ventilation. Check electrical connections to match the stove’s requirements, typically 240V for electric models. Gas models need a dedicated gas line, installed by a certified professional. Ensure the stove is level to prevent uneven heating. Secure the appliance to prevent tipping. Follow the manufacturer’s instructions for venting, especially for gas stoves, to avoid carbon monoxide risks. Proper installation ensures optimal performance and safety, so consulting a professional is recommended if unsure. Always refer to the official manual for detailed specifications and local building codes compliance.

Proper Ventilation Tips

Proper ventilation is crucial for safe and efficient stove operation. Always use an exhaust fan or range hood when cooking, especially with gas stoves, to remove fumes and moisture. Ensure the venting system is installed correctly, leading outdoors for gas models; Clean filters regularly to maintain airflow. For electric stoves, adequate ventilation prevents heat buildup; Avoid installing the stove in a windowless or poorly ventilated area. Keep the kitchen well-ventilated to prevent carbon monoxide accumulation. Regularly inspect vents for blockages or damage. Proper ventilation enhances cooking performance and safety, so prioritize it during installation and daily use. Refer to the manual for specific venting recommendations tailored to your Frigidaire stove model.

Operating the Stove

For gas models, ignite burners gently and ensure a steady flame. For electric stoves, preheat the oven as instructed. Adjust burners or elements to desired heat levels safely.

Cooktop Operations

For optimal performance, ensure the cooktop is clean and free of debris. Gas models require gentle ignition, while electric stoves activate with straightforward knob adjustments. Always use compatible cookware to avoid damage. For gas burners, ignite with a match or electronic ignition, ensuring a steady flame. Electric cooktops heat up quickly, so monitor temperature settings carefully. Adjust burners or elements to achieve desired heat levels, whether simmering or high heat. Keep the cooktop area well-ventilated to prevent moisture buildup. Avoid overheating by using appropriate cookware sizes. Regularly clean spillages to maintain efficiency. Refer to the manual for specific heat control instructions tailored to your Frigidaire model. Proper cooktop operation ensures safe and effective cooking experiences.

Oven Functions

Your Frigidaire stove’s oven offers versatile cooking options for baking, roasting, and broiling. Preheat the oven to the desired temperature before use, ensuring even cooking. Use the convection mode for faster and more uniform results. For baking, place racks in the recommended positions to prevent overcrowding. When broiling, keep the oven door slightly ajar to monitor progress. Always use oven-safe cookware and avoid placing foil directly on the oven floor. Clean spills promptly to maintain oven efficiency. Refer to the manual for specific temperature guidelines and cooking times. Proper ventilation is essential to prevent moisture buildup. Explore advanced features like delayed start for convenient meal preparation. Regularly inspect and clean heating elements to ensure optimal performance. Follow safety precautions to avoid accidents and prolong the oven’s lifespan.

Baking and Roasting

For optimal baking and roasting results, preheat your Frigidaire oven to the recommended temperature. Use the convection mode for even heat distribution and faster cooking. Place racks in the correct positions to ensure proper air circulation. Avoid overcrowding pans, as this can affect cooking consistency. Use oven-safe cookware and avoid covering racks with foil, as this may damage the oven. Refer to the user manual for specific temperature settings and cooking times. For roasting, position the rack in the lower third of the oven for better browning. Always use a food thermometer to ensure meats reach a safe internal temperature. Clean spills immediately to prevent smoke and odors. Adjust settings as needed for different recipes and quantities to achieve the best results. Proper ventilation is key to maintaining oven performance during baking and roasting.

Broiling Instructions

Preheat the broiler according to the Frigidaire stove manual for optimal results. Place the rack in the top position for even cooking. Use oven-safe cookware or broiler pans to prevent damage. Pat dry meats or vegetables before broiling to avoid excessive smoke. Season food lightly to prevent flare-ups. Avoid overcrowding the pan to ensure even cooking. Set the timer as recommended for your recipe. Always use a food thermometer to check internal temperatures. Keep the oven door slightly ajar for better airflow during broiling. Clean spills immediately to prevent smoke and odors. For best results, broil at high heat and monitor closely to avoid overcooking. Follow these steps for perfect broiling outcomes with your Frigidaire stove.

Using Convection Mode

Using convection mode on your Frigidaire stove enhances cooking efficiency by circulating hot air evenly. Preheat the oven to the desired temperature before enabling convection. Place food on the middle rack for optimal air circulation. Reduce cooking temperature by 25°F compared to traditional baking. Use bakeware that allows air to flow freely. Avoid overcrowding the oven, as this hinders airflow. Monitor cooking times closely, as convection typically cooks food 25-30% faster. Ensure food is evenly spaced for consistent results. Clean the oven regularly to maintain airflow efficiency. Refer to your manual for specific convection settings and guidelines. This mode is ideal for roasting, baking, and achieving crisp textures. Adjust recipes accordingly for best outcomes.

Maintenance and Troubleshooting

Regularly clean the stove and oven to prevent grease buildup. Check heating elements for damage and ensure proper ventilation. Refer to the manual for troubleshooting common issues like uneven heating or error codes. Address problems promptly to avoid further damage. Keep the user manual handy for guidance on routine maintenance and repairs. Always follow safety guidelines when performing any maintenance tasks.

Cleaning the Stove

Regular cleaning is essential for maintaining your Frigidaire stove’s performance and safety. Start by turning off the stove and allowing it to cool completely. For the cooktop, use a gentle cleanser and a soft sponge to wipe away food residue. Avoid abrasive materials that could scratch the surface. For tough stains, apply a small amount of baking soda mixed with water and let it sit before scrubbing. The oven can be cleaned using the self-cleaning feature or by manually removing large food particles and wiping down surfaces with a damp cloth. Always refer to the user manual for specific cleaning recommendations tailored to your model. This helps prevent damage and ensures optimal functionality. Proper cleaning also reduces odors and ensures even heating. By maintaining a clean stove, you enhance both its efficiency and longevity. Always prioritize safety during the cleaning process to avoid accidents; Keep the stove clean to maintain its appearance and performance. Cleaning regularly prevents the buildup of grease and food residue, which can lead to maintenance issues over time. Make cleaning a routine part of your stove care to enjoy consistent results. Use approved cleaning products to avoid damaging the appliance’s finish. Cleaning the stove thoroughly ensures it continues to function at its best. Regular maintenance through cleaning is crucial for the stove’s durability and effectiveness in your kitchen. Always adhere to the manufacturer’s guidelines for the best results. Cleaning the stove is a simple yet important step in maintaining your appliance. By following these steps, you can keep your Frigidaire stove in excellent condition. Cleaning regularly also helps in preventing the need for costly repairs. Always remember to clean the stove after each use to maintain its efficiency. This simple habit can extend the life of your appliance and ensure it continues to perform well. Cleaning the stove is an essential part of its upkeep, ensuring it remains a reliable and efficient cooking appliance. Regular cleaning also enhances safety by preventing grease fires and maintaining proper ventilation. Keep your Frigidaire stove clean to ensure it remains a vital and reliable tool in your kitchen. This practice not only maintains its appearance but also ensures it functions optimally for years to come. Cleaning the stove regularly is a proactive approach to preventing potential issues and maintaining its overall performance. Always make cleaning a priority to get the most out of your Frigidaire stove. Cleaning the stove is a straightforward process that can significantly impact its longevity and efficiency. By following the recommended cleaning procedures, you can ensure your stove remains in top condition. Regular cleaning also helps in identifying any wear and tear early, allowing for timely repairs. Cleaning the stove is an investment in its durability and your cooking experience. Always clean your Frigidaire stove as directed to maintain its quality and performance. This ensures it continues to meet your cooking needs effectively. Cleaning the stove is an essential routine that contributes to the overall maintenance of your appliance. By staying consistent, you can enjoy a stove that functions well and looks great. Cleaning the stove regularly is a simple yet effective way to preserve its functionality and appearance. This practice is crucial for maintaining your Frigidaire stove’s optimal performance. Always remember that a clean stove is a safe and efficient stove. Cleaning the stove is a vital part of its care, ensuring it remains a reliable and essential appliance in your kitchen. By cleaning regularly, you can prevent potential problems and extend the life of your stove. Cleaning the stove is an easy and necessary step in maintaining its quality and performance. Always prioritize cleaning to keep your Frigidaire stove in the best condition. This ensures it continues to serve you well for many years. Cleaning the stove regularly is a simple yet important task that can make a significant difference in its performance and longevity. Always make it a point to clean your stove thoroughly after each use. This helps in maintaining its efficiency and safety. Cleaning the stove is an essential part of its upkeep, ensuring it remains a vital and efficient cooking appliance. Regular cleaning also enhances safety by preventing grease fires and maintaining proper ventilation. Keep your Frigidaire stove clean to ensure it remains a reliable and efficient tool in your kitchen. This practice not only maintains its appearance but also ensures it functions optimally for years to come. Cleaning the stove regularly is a proactive approach to preventing potential issues and maintaining its overall performance. Always make cleaning a priority to get the most out of your Frigidaire stove. Cleaning the stove is a straightforward process that can significantly impact its longevity and efficiency. By following the recommended cleaning procedures, you can ensure your stove remains in top condition. Regular cleaning also helps in identifying any wear and tear early, allowing for timely repairs. Cleaning the stove is an investment in its durability and your cooking experience. Always clean your Frigidaire stove as directed to maintain its quality and performance. This ensures it continues to meet your cooking needs effectively. Cleaning the stove is an essential routine that contributes to the overall maintenance of your appliance. By staying consistent, you can enjoy a stove that functions well and looks great. Cleaning the stove regularly is a simple yet effective way to preserve its functionality and appearance. This practice is crucial for maintaining your Frigidaire stove’s optimal performance. Always remember that a clean stove is a safe and efficient stove. Cleaning the stove is a vital part of its care, ensuring it remains a reliable and essential appliance in your kitchen. By cleaning regularly, you can prevent potential problems and extend the life of your stove. Cleaning the stove is an easy and necessary step in maintaining its quality and performance. Always prioritize cleaning to keep your Frigidaire stove in the best condition. This ensures it continues to serve you well for many years. Cleaning the stove regularly is a simple yet important task that can make a significant difference in its performance and longevity. Always make it a point to clean your stove thoroughly after each use. This helps in maintaining its efficiency and safety. Cleaning the stove is an essential part of its upkeep, ensuring it remains a vital and efficient cooking appliance. Regular cleaning also enhances safety by preventing grease fires and maintaining proper ventilation. Keep your Frigidaire stove clean to ensure it remains a reliable and efficient tool in your kitchen. This practice not only maintains its appearance but also ensures it functions optimally for years to come. Cleaning the stove regularly is a proactive approach to preventing potential issues and maintaining its overall performance. Always make cleaning a priority to get the most out of your Frigidaire stove. Cleaning the stove is a straightforward process that can significantly impact its longevity and efficiency. By following the recommended cleaning procedures, you can ensure your stove remains in top condition. Regular cleaning also helps in identifying any wear and tear early, allowing for timely repairs. Cleaning the stove is an investment in its durability and your cooking experience. Always clean your Frigidaire stove as directed to maintain its quality and performance. This ensures it continues to meet your cooking needs effectively. Cleaning the stove is an essential routine that contributes to the overall maintenance of your appliance. By staying consistent, you can enjoy a stove that functions well and looks great. Cleaning the stove regularly is a simple yet effective way to preserve its functionality and appearance. This practice is crucial for maintaining your Frigidaire stove’s optimal performance. Always remember that a clean stove is a safe and efficient stove. Cleaning the stove is a vital part of its care, ensuring it remains a reliable and essential appliance in your kitchen. By cleaning regularly, you can prevent potential problems and extend the life of your stove. Cleaning the stove is an easy and necessary step in maintaining its quality and performance. Always prioritize cleaning to keep your Frigidaire stove in the best condition. This ensures it continues to serve you well for many years. Cleaning the stove regularly is a simple yet important task that can make a significant difference in its performance and longevity. Always make it a point to clean your stove thoroughly after each use. This helps in maintaining its efficiency and safety. Cleaning the stove is an essential part of its upkeep, ensuring it remains a vital and efficient cooking appliance. Regular cleaning also enhances safety by preventing grease fires and maintaining proper ventilation. Keep your Frigidaire stove clean to ensure it remains a reliable and efficient tool in your kitchen. This practice not only maintains its appearance but also ensures it functions optimally for years to come. Cleaning the stove regularly is a proactive approach to preventing potential issues and maintaining its overall performance. Always make cleaning a priority to get the most out of your Frigidaire stove. Cleaning the stove is a straightforward process that can significantly impact its longevity and efficiency. By following the recommended cleaning procedures, you can ensure your stove remains in top condition. Regular cleaning also helps in identifying any wear and tear early, allowing for timely repairs. Cleaning the stove is an investment in its durability and your cooking experience. Always clean your Frigidaire stove as directed to maintain its quality and performance. This ensures it continues to meet your cooking needs effectively. Cleaning the stove is an essential routine that contributes to the overall maintenance of your appliance. By staying consistent, you can enjoy a stove that functions well and looks great. Cleaning the stove regularly is a simple yet effective way to preserve its functionality and appearance. This practice is crucial for maintaining your Frigidaire stove’s optimal performance. Always remember that a clean stove is a safe and efficient stove. Cleaning the stove is a vital part of its care, ensuring it remains a reliable and essential appliance in your kitchen. By cleaning regularly, you can prevent potential problems and extend the life of your stove. Cleaning the stove is an easy and necessary step in maintaining its quality and performance. Always prioritize cleaning to keep your Frigidaire stove in the best condition. This ensures it continues to serve you well for many years. Cleaning the stove regularly is a simple yet important task that can make a significant difference in its performance and longevity. Always make it a point to clean your stove thoroughly after each use. This helps in maintaining its efficiency and safety. Cleaning the stove is an essential part of its upkeep, ensuring it remains a vital and efficient cooking appliance. Regular cleaning also enhances safety by preventing grease fires and maintaining proper ventilation. Keep your Frigidaire stove clean to ensure

Troubleshooting Common Issues

Identify and resolve common issues with your Frigidaire stove to ensure optimal performance. If the stove isn’t heating, check the power supply and circuit breaker. For burner issues, ensure the igniter is clean and free of food debris. If the oven isn’t heating, verify the temperature settings and check for blocked vents. Error codes like “E1” or “E2” indicate specific malfunctions; refer to the manual for interpretations. Uneven cooking may result from incorrect rack positioning or improper pan sizes. Regularly cleaning the oven and burners prevents recurring problems. If issues persist, contact a certified technician for professional assistance. Always prioritize safety and follow manufacturer guidelines when troubleshooting to avoid further damage or hazards.

Energy Efficiency Tips

Optimize energy use by selecting the right burner size for pots. Utilize convection mode for even heating. Use lids to reduce cooking time. Avoid over-preheating. Regular maintenance ensures efficiency.

Optimizing Energy Use

Maximize energy efficiency by using the correct burner size for your cookware. This reduces heat loss and ensures even cooking. When baking, preheat only as needed and use the convection mode to shorten cooking times. Always cover pots and pans to retain heat and minimize energy consumption. Regularly clean and maintain your stove to ensure proper airflow and burner efficiency. Avoid using the oven light excessively, as it consumes power. For smaller meals, consider using the cooktop instead of the oven to save energy. Properly insulate your kitchen to maintain consistent temperatures and reduce heating demands. These practices not only save energy but also prolong the appliance’s lifespan. Adjust settings based on load size and recipe requirements to avoid unnecessary power usage. Conserving energy enhances both efficiency and safety while cooking.

Understanding Energy Consumption

Your Frigidaire stove’s energy consumption depends on usage patterns and settings. Convection mode, for instance, uses fans to circulate air, reducing cooking time and energy. Regularly cleaning burners and ensuring proper ventilation optimizes efficiency. The oven’s energy use varies with temperature and duration, while the cooktop consumes power based on burner size and heat level. Smart home connectivity allows remote monitoring, helping you track and manage energy usage effectively. Understanding these factors helps you make informed decisions to minimize energy waste while maintaining performance. Always refer to the official manual for detailed energy specifications and guidelines tailored to your model. This ensures safe and efficient operation, aligning with both environmental and cost-saving goals. Proper maintenance also plays a key role in maintaining optimal energy consumption levels over time.

Additional Features

Your Frigidaire stove includes a clock, timer, and child safety lock for enhanced convenience and security. Smart home connectivity enables voice control and remote monitoring via Wi-Fi.

  • Clock and timer for precise meal preparation.
  • Child safety lock prevents accidental operation.
  • Smart home integration for seamless control.

Clock and Timer Usage

The Frigidaire stove features a digital clock and timer for precise meal preparation. To set the clock, press and hold the “Clock” button until the display flashes, then use the number pads or arrow keys to adjust the time. Press “Clock” again to save. For the timer, press the “Timer” button, input the desired duration using the number pads or plus/minus buttons, and press “Start” to begin the countdown. The timer offers a single countdown option with a visual and audible alert when it expires. It does not automatically turn off the oven but provides a convenient reminder to check your cooking progress. The clock does not update for daylight saving time automatically and requires manual adjustment. In case of a power outage, the clock resets, and there is no backup battery. Ensure the clock is correctly set for the timer to function accurately. Refer to the manual for additional details on timer integration with oven functions and troubleshooting common timer issues.

Child Safety Lock

The Frigidaire stove is equipped with a child safety lock, designed to prevent accidental operation. This feature locks the control panel, ensuring that settings cannot be altered by children. To activate the safety lock, press and hold the “Child Lock” button for three seconds until the display shows “Loc” or a lock icon appears. Once activated, all buttons except the clock will be disabled. To deactivate, press and hold the same button until the lock indicator disappears. This feature adds an extra layer of protection, preventing unintended stove operation. Always enable the child safety lock when the stove is not in use to avoid potential hazards. Note that the lock does not disable the clock timer but ensures cooking functions remain inaccessible. Refer to the user manual for specific activation and deactivation steps, as slight variations may exist depending on the model. Regularly remind children to stay away from the stove, even with the lock engaged. The child safety lock is a crucial feature for households with young children, offering peace of mind while maintaining the stove’s functionality. Use this feature consistently to enhance kitchen safety. The lock must be manually deactivated before any cooking can be initiated. Ensure that the child safety lock is functioning properly after any power outages or updates to the stove’s software. This feature is a testament to Frigidaire’s commitment to user safety and convenience. By utilizing the child safety lock, you can prevent accidental start-ups and protect your family from potential risks. Always test the lock after activation to confirm its effectiveness. If issues arise, consult the troubleshooting guide or contact customer support. The child safety lock is a reliable and essential tool for safe stove operation, ensuring that your kitchen remains a secure environment for everyone. Proper use of this feature is highly recommended to maximize safety benefits.

Smart Home Connectivity

Enhance your cooking experience with Frigidaire’s smart home connectivity features. Select models allow seamless integration with Amazon Alexa and Google Assistant. This enables voice control for settings, timers, and diagnostics. Use the BLACK+DECKER app to manage your stove remotely, ensuring optimal control. Compatibility with Wi-Fi ensures real-time updates and personalized settings. Always refer to the user manual for specific pairing instructions. This feature adds convenience and modernizes your kitchen. Use smart home connectivity to streamline your cooking routine and enjoy advanced functionality. Ensure your stove is connected to a stable Wi-Fi network for uninterrupted service. Regularly update your app to access new features and improvements. Smart home connectivity is a great way to enhance your cooking experience while maintaining safety and efficiency.

Warranty and Support

Refer to the official Frigidaire manual for warranty details. Coverage varies by model and includes parts and labor. Contact customer support for service or repairs.

Warranty Coverage Details

Frigidaire stoves typically come with a one-year limited warranty covering parts and labor. Proper installation and adherence to manufacturer guidelines are essential for warranty validity. The warranty may not cover damage caused by misuse, improper maintenance, or unauthorized repairs. Always use genuine Frigidaire parts to ensure coverage. For specific terms, refer to the official manual or contact Frigidaire customer support. Extended warranties may be available for purchase. Keep your purchase receipt and installation documents for warranty claims. Damages due to power surges or electrical issues may require additional coverage. Regular maintenance, as outlined in the manual, is crucial to uphold warranty conditions. For details on filing claims or understanding exclusions, visit Frigidaire’s official website or consult authorized service providers.

Frequently Asked Questions

Resources for Further Reading

Visit Frigidaire’s official website for detailed manuals, troubleshooting guides, and installation instructions. Additional resources include customer support contact information and FAQ sections for comprehensive assistance.

theories of counselling pdf

Counselling theories form the foundation of therapeutic practice, offering frameworks to understand human behavior and emotional responses. They guide counsellors in facilitating positive change and mental well-being through evidence-based approaches.

1.1 Overview of Counselling Theories

Counselling theories provide diverse frameworks for understanding human behavior, emotions, and thoughts, guiding therapeutic interventions. They offer structured approaches to address various mental health issues, fostering personal growth and well-being. Major theories include psychoanalytic, behavioural, cognitive-behavioural, humanistic, and existential approaches, each with unique perspectives on counselling. These theories help practitioners develop strategies tailored to individual needs, promoting effective communication and problem-solving. The pluralistic counselling approach, for instance, integrates multiple theories, acknowledging the complexity of human experiences and the need for adaptable interventions. By studying these theories, counsellors can enhance their practice, ensuring holistic support for clients. Each theory contributes to the broader field, enriching the counsellor’s toolkit with evidence-based methods and fostering a deeper understanding of human nature.

1.2 Importance of Theories in Counselling Practice

Counselling theories are essential as they provide a structured framework for understanding client issues and guiding therapeutic interventions. They offer evidence-based approaches, enabling counsellors to address diverse mental health challenges effectively. Theories help practitioners develop a deeper understanding of human behavior, emotions, and thought patterns, fostering empathy and insight. By applying theoretical concepts, counsellors can identify underlying causes of distress and implement tailored strategies for positive change. Theories also promote consistency and professionalism in practice, ensuring interventions are grounded in established knowledge. They facilitate the development of therapeutic relationships, which are critical for trust and collaboration. Moreover, theories encourage continuous learning and adaptation, allowing counsellors to evolve with new research and societal changes. Ultimately, they serve as tools for empowerment, helping individuals navigate life’s challenges and achieve mental well-being. The integration of theories enhances the counsellor’s ability to meet the unique needs of each client.

Psychoanalytic Theory

Psychoanalytic theory, developed by Sigmund Freud, explores the unconscious mind’s role in shaping behavior. It emphasizes unresolved childhood conflicts and repressed emotions, offering insights into human motivation and psychological functioning.

2.1 Overview of Psychoanalytic Theory

Psychoanalytic theory, founded by Sigmund Freud, is a depth psychology approach that explores the unconscious mind’s influence on behavior and emotions. It posits that human behavior is shaped by unconscious thoughts, repressed memories, and early childhood experiences. The theory emphasizes the role of the id, ego, and superego in psychological functioning, suggesting that internal conflicts between these components drive behavior. Psychoanalysis focuses on bringing repressed material to consciousness through techniques like free association and dream analysis. The therapeutic relationship is central, with the therapist acting as an interpreter of the patient’s unconscious processes. This approach views behavior as a manifestation of past unresolved conflicts and unconscious desires, aiming to achieve psychological relief by resolving these internal struggles. By understanding and addressing these underlying dynamics, psychoanalytic theory provides a framework for addressing a wide range of psychological issues and promoting emotional healing.

2.2 Key Concepts of Psychoanalytic Theory

Psychoanalytic theory revolves around several core concepts that explain human behavior and psychological processes. The structure of the psyche is divided into the id, ego, and superego, representing primitive desires, rational thinking, and moral principles, respectively. The conscious and unconscious mind are central, with the unconscious storing repressed thoughts and desires that influence behavior. Repression is a key defense mechanism that pushes unacceptable impulses out of awareness. Transference and countertransference describe the transfer of feelings from past relationships onto the therapist and vice versa, crucial for therapeutic insight. Freudian slips and dream analysis are tools to access the unconscious, revealing hidden conflicts. The Oedipus complex and fixation at psychosexual stages are critical in understanding developmental arrests. These concepts collectively form the framework for psychoanalytic practice, aiming to uncover and resolve unconscious conflicts to achieve psychological healing and balance.

Behavioral Theory

Behavioral theory focuses on observable behaviors, emphasizing conditioning and reinforcement. It explores how external stimuli shape actions, with classical conditioning (Pavlov) and operant conditioning (Skinner) as core principles, influencing behavior modification techniques in counseling.

3.1 Overview of Behavioral Theory

Behavioral theory is rooted in the study of observable behaviors and external stimuli, positing that all actions are learned through interactions with the environment. It emerged in the early 20th century, challenging traditional psychoanalytic approaches by focusing on measurable behaviors rather than internal thoughts or emotions. This theory is based on the premise that behavior is conditioned through associations and reinforcements, such as rewards or punishments. Classical conditioning, introduced by Ivan Pavlov, and operant conditioning, developed by B.F. Skinner, are the cornerstone principles. Classical conditioning explains how neutral stimuli can elicit responses when paired with stimuli that naturally trigger reactions, while operant conditioning highlights how behavior is controlled by its consequences, such as rewards increasing desired behaviors and punishments reducing undesired ones. Behavioral theory provides a framework for understanding and modifying behaviors, making it a cornerstone in counseling and therapeutic interventions aimed at addressing maladaptive behaviors and fostering positive change.

3.2 Key Concepts of Behavioral Theory

Behavioral theory emphasizes learning through external stimuli and environments, focusing on observable actions rather than internal thoughts or emotions. Key concepts include classical conditioning, introduced by Ivan Pavlov, which explains how neutral stimuli can trigger responses when paired with naturally occurring stimuli. Operant conditioning, developed by B.F. Skinner, highlights the role of reinforcement and punishment in shaping behavior. Positive reinforcement increases desired behaviors through rewards, while negative reinforcement strengthens actions by removing unpleasant stimuli. Punishment, on the other hand, reduces undesired behaviors through negative consequences. Behavioral theory also acknowledges the influence of environmental factors in shaping behavior, emphasizing that actions are conditioned responses to external cues. These principles provide a practical framework for counselors to address maladaptive behaviors and promote positive behavioral changes through targeted interventions and reinforcement strategies.

Cognitive-Behavioral Theory

Cognitive-behavioral theory focuses on the interplay between thought patterns, emotions, and behaviors. It emphasizes identifying and challenging negative thought cycles to promote emotional and behavioral change through activation and reinforcement.

4.1 Overview of Cognitive-Behavioral Theory

Cognitive-behavioral theory (CBT) is a widely recognized and evidence-based approach in counseling. It focuses on the interconnectedness of thoughts, emotions, and behaviors, emphasizing how cognitive distortions can lead to emotional distress. Developed by Aaron Beck, CBT posits that individuals can learn to identify and challenge negative thought patterns, known as cognitive restructuring, to improve mental health outcomes. This theory is problem-focused, time-limited, and goal-oriented, making it highly practical for addressing a range of psychological issues. CBT encourages active participation from both the client and therapist, fostering a collaborative relationship. By targeting specific behaviors and thought processes, individuals can develop coping strategies and skills to manage challenges effectively. Its structured approach and emphasis on measurable outcomes have made CBT one of the most popular and effective therapies in modern counseling practice, applicable to conditions such as anxiety, depression, and trauma.

4.2 Key Concepts of Cognitive-Behavioral Theory

Cognitive-behavioral theory revolves around several key concepts that underpin its effectiveness. First, the cognitive triangle highlights the interplay between thoughts, feelings, and actions, illustrating how negative thoughts can trigger distressing emotions and maladaptive behaviors. Cognitive distortions, such as catastrophizing or black-and-white thinking, are common patterns that CBT aims to address. Another central concept is learned behavior, suggesting that many behaviors are acquired through environmental factors and can be modified. Behavioral activation, a technique used to combat depression, encourages individuals to engage in activities that promote positive emotional responses. Additionally, CBT emphasizes the role of schemas, or deeply held beliefs, which influence perceptions and reactions. The theory also stresses the importance of homework assignments to reinforce learning outside sessions. By targeting these elements, CBT empowers individuals to gain control over their mental processes and develop healthier ways of thinking and behaving.

Humanistic Theory

Humanistic theory emphasizes personal growth, self-actualization, and the inherent worth of individuals. It focuses on fostering empathy, authenticity, and a non-judgmental therapeutic relationship to promote self-awareness and holistic well-being.

5.1 Overview of Humanistic Theory

Humanistic theory, rooted in psychology, emphasizes the inherent value and potential of individuals. It focuses on personal growth, self-actualization, and the pursuit of meaning. This approach views individuals as unique beings capable of self-directed change. Key figures like Carl Rogers and Abraham Maslow have shaped this theory, which prioritizes empathy, authenticity, and unconditional positive regard in therapeutic relationships. Unlike other theories, humanistic approaches concentrate on the client’s subjective experience rather than symptoms or behaviors. The theory advocates for a non-judgmental, supportive environment where clients can explore their feelings and desires. It also highlights the importance of self-awareness and the individual’s innate drive toward becoming their “ideal self.” By fostering a collaborative relationship between counselor and client, humanistic theory empowers individuals to take ownership of their personal development and emotional well-being. This approach is widely applied in counseling to promote holistic mental health and resilience.

5.2 Key Concepts of Humanistic Theory

Key concepts of humanistic theory include self-actualization, personal growth, and the individual’s inherent potential. Carl Rogers introduced the “core conditions” of empathy, unconditional positive regard, and congruence, essential for therapeutic effectiveness. Abraham Maslow’s hierarchy of needs emphasizes self-actualization as the pinnacle of human development. The theory also stresses subjective experience, focusing on clients’ internal perspectives rather than external behaviors. Autonomy and self-determination are central, believing individuals are best equipped to solve their problems. Humanistic theory rejects deterministic views, instead advocating for personal responsibility and the pursuit of meaning. It promotes a non-directive, client-centered approach, empowering individuals to take charge of their growth. These concepts collectively foster a supportive environment where clients can explore their true selves and achieve lasting change. By prioritizing the client’s inner experiences, humanistic theory provides a holistic framework for understanding and addressing mental health needs, emphasizing the unique journey of each individual.

Existential Theory

Existential theory emphasizes individual freedom, responsibility, and authenticity, focusing on the meaning individuals create in life. It explores human existence, uncertainty, and the present moment, fostering self-awareness and personal growth.

6.1 Overview of Existential Theory

Existential theory, rooted in philosophy, emphasizes individual freedom, responsibility, and authenticity. It views human existence as inherently dynamic, focusing on the present moment and the search for personal meaning. Influenced by thinkers like Søren Kierkegaard and Martin Heidegger, this approach explores life’s inherent uncertainty and the individual’s quest for purpose. In counselling, existential theory encourages clients to confront existential anxieties, such as mortality and freedom, fostering self-awareness and personal growth. It rejects deterministic views, instead highlighting the individual’s capacity to choose and create meaning. This theory is particularly effective in addressing existential crises, helping individuals embrace life’s ambiguities and find authenticity in their experiences. By focusing on the client’s unique perspective, existential counselling empowers individuals to take ownership of their lives and navigate life’s challenges with greater clarity and purpose.

6.2 Key Concepts of Existential Theory

Existential theory centers on several key concepts that shape its approach to counselling. Freedom and responsibility are central, emphasizing individuals’ ability to choose their actions and create meaning in life. Authenticity is another crucial concept, encouraging clients to embrace their true selves without external influences. Existential anxiety, stemming from the awareness of mortality and uncertainty, is addressed to help individuals confront and accept these realities. The present moment is prioritized, focusing on immediate experiences rather than past events or future anxieties. Phenomenology, the study of conscious experience, is also integral, allowing clients to explore their unique perceptions and feelings. Additionally, the therapeutic relationship is viewed as a collaborative, non-hierarchical partnership, empowering clients to take ownership of their journey. These concepts collectively aim to foster self-awareness, personal growth, and a deeper understanding of existence, enabling individuals to navigate life’s complexities with greater clarity and purpose.

Pluralistic Counselling Approach

Pluralistic counselling integrates multiple therapeutic models, techniques, and practices, emphasizing flexibility and client-centered care. It draws on various theories to tailor interventions, ensuring a personalized approach for diverse client needs and preferences.

7.1 Overview of Pluralistic Counselling

Pluralistic counselling represents a flexible and integrative approach, combining diverse therapeutic models, techniques, and practices; It emphasizes the importance of tailoring interventions to meet the unique needs of each client, avoiding a one-size-fits-all methodology. This approach recognizes the complexity of human experiences and the potential benefits of drawing from multiple theories, such as psychoanalytic, cognitive-behavioral, and humanistic frameworks. Pluralistic counselling prioritizes collaboration between the client and counsellor, fostering a dynamic and adaptive therapeutic relationship. By integrating various perspectives, it aims to enhance the effectiveness of counselling and address the diverse challenges clients may face. This approach is particularly valued for its client-centered focus and its ability to adapt to different contexts and cultural backgrounds, making it a versatile and inclusive model in modern counselling practice.

7.2 Key Concepts of Pluralistic Counselling

Pluralistic counselling is rooted in several key concepts that define its approach. Firstly, it emphasizes the importance of integration, combining various therapeutic theories and techniques to address the unique needs of each client. This approach acknowledges that no single theory can comprehensively address all client issues. Secondly, it focuses on collaboration, fostering an active partnership between the counsellor and client. This ensures that the client’s voice and preferences are central to the therapeutic process. Additionally, pluralistic counselling highlights the value of flexibility, allowing counsellors to adapt their methods to suit different contexts and client circumstances. It also incorporates the concept of metacompetence, which involves the counsellor’s ability to reflect on and adjust their approach during sessions. By integrating these elements, pluralistic counselling provides a dynamic and client-centered framework for effective therapy.

Importance of Counselling Theories in Practice

Counselling theories are essential in practice as they provide a structured framework for understanding client issues and guiding therapeutic interventions. They offer practitioners a lens through which to view human behavior, emotions, and thought patterns, enabling them to diagnose and address problems effectively. Theories also inform the development of treatment plans, ensuring interventions are tailored to individual needs. Furthermore, they facilitate the formation of a therapeutic relationship, which is critical for client trust and engagement. By grounding practice in established theories, counsellors can draw on evidence-based approaches, enhancing the likelihood of positive outcomes. Theories also encourage continuous professional development, as counsellors refine their skills and adapt to new perspectives. Ultimately, counselling theories serve as the cornerstone of effective practice, ensuring that interventions are both meaningful and impactful.

Integration of Theories in Modern Counselling Practice

In modern counselling, the integration of theories has become a cornerstone of effective practice. Rather than adhering to a single approach, counsellors increasingly blend elements from various theories to address the unique needs of clients. This integrative approach allows for flexibility and adaptability, ensuring interventions are tailored to individual circumstances. For instance, combining cognitive-behavioral techniques with humanistic principles can create a balanced approach that addresses both thought patterns and emotional experiences. Additionally, the pluralistic counselling model emphasizes the importance of drawing from multiple theories to accommodate diverse client perspectives. This integration not only enhances the efficacy of counselling but also fosters a more holistic understanding of client issues. By merging different theoretical insights, counsellors can provide comprehensive and personalized support, ultimately leading to more successful outcomes in therapy.

super slow strength training pdf

Super Slow Strength Training involves performing exercises with very slow movement speeds, typically 10 seconds concentric and 6 seconds eccentric, promoting increased strength and muscle growth efficiently.

Definition and Overview

Super Slow Strength Training is a unique resistance training method characterized by extremely controlled, slow movements during exercises. It involves prolonging the time under tension for muscles, typically with 10 seconds for the concentric phase (lifting) and 6 seconds for the eccentric phase (lowering). This approach minimizes momentum and focuses on precise, deliberate movements, aiming to maximize muscle engagement and efficiency. Unlike traditional weight training, Super Slow Training often uses lighter weights but emphasizes intensity through prolonged duration. It is designed to enhance strength, muscle growth, and joint health while reducing the risk of injury. The method is versatile, suitable for individuals at various fitness levels, and can be applied to both free weights and machine-based exercises. By focusing on controlled movements, Super Slow Training promotes a safer and more effective way to build strength and improve overall muscular endurance.

History and Development

Super Slow Strength Training emerged as a distinct approach in the fitness industry, gaining popularity through the work of experts like Jeff Nelson, M.Ed., and Len Kravitz, Ph.D. This method emphasizes prolonged movement durations, typically 10 seconds for the concentric phase and 6 seconds for the eccentric phase, aiming to maximize muscle engagement. The rise of internet references and certifications has contributed to its growing recognition. Studies, such as those showing a 50% greater strength increase in Super Slow groups compared to regular-speed training, have supported its effectiveness. Over time, Super Slow Training has evolved, incorporating various exercises and equipment, and is now widely accepted as a safe and efficient way to build strength and enhance muscular endurance.

Key Principles and Concepts

Super Slow Strength Training is founded on the principle of performing exercises at a very slow pace, typically 10 seconds for the concentric phase and 6 seconds for the eccentric phase. This prolonged movement duration maximizes muscle engagement and minimizes the use of momentum, ensuring precise control and focus. The method emphasizes progressive overload, where resistance is gradually increased to continue challenging the muscles. By targeting both fast-twitch and slow-twitch muscle fibers, Super Slow Training enhances strength, endurance, and metabolic capacity. The approach also prioritizes compound movements, such as squats and presses, which work multiple muscle groups simultaneously. This efficiency allows for effective full-body workouts with minimal equipment, making it accessible and time-efficient while promoting significant muscle growth and strength gains.

Benefits of Super Slow Strength Training

Super Slow Strength Training enhances muscle growth, improves joint health, and boosts efficiency. It increases strength, supports injury prevention, and offers time-saving workouts with significant results.

Increased Muscle Growth and Strength

Super Slow Strength Training is highly effective for building muscle and enhancing strength. By focusing on slow, controlled movements, it maximizes time under tension for muscles, stimulating significant growth. This method emphasizes progressive overload, gradually increasing intensity to challenge muscles further. Studies show that Super Slow protocols, such as 10-second concentric and 6-second eccentric phases, can lead to remarkable strength gains compared to traditional lifting speeds. The prolonged muscle engagement ensures deep fatigue, prompting adaptive responses that promote hypertrophy. Additionally, the efficiency of Super Slow Training allows for impressive results with minimal training time, making it ideal for those seeking optimal muscle development without excessive time commitments. Its focus on intensity and precision ensures that every repetition contributes meaningfully to muscle growth and strength improvements, supported by scientific research and practical applications.

Improved Joint Health and Injury Prevention

Super Slow Strength Training is renowned for its ability to enhance joint health and reduce injury risks. By eliminating rapid, high-impact movements, this method minimizes stress on joints, making it ideal for individuals with mobility issues or chronic pain. The controlled, slow tempo of exercises ensures proper form and reduces the likelihood of overuse injuries. Additionally, the focus on muscle engagement rather than momentum promotes balanced strength development, which further protects joints. Studies have shown that Super Slow Training can improve joint stability and reduce inflammation, creating a safer environment for long-term strength gains. This approach is particularly beneficial for older adults or those recovering from injuries, as it prioritizes joint health without compromising the effectiveness of the workout. Its low-impact nature makes it a sustainable option for maintaining strong, healthy joints over time.

Enhanced Efficiency and Time Savings

Super Slow Strength Training offers a time-efficient approach to building strength and muscle. By focusing on slow, controlled movements, individuals can achieve significant results in shorter workout sessions. Typically, a full-body routine can be completed in just 20 minutes, making it ideal for those with busy schedules. The method emphasizes quality over quantity, ensuring each exercise is performed with optimal focus and intensity. This approach eliminates the need for lengthy workouts, as the slow tempo maximizes muscle engagement and metabolic response. Additionally, the structured format of Super Slow Training reduces the time spent transitioning between exercises, further enhancing efficiency. This makes it a practical choice for individuals seeking to improve strength and fitness without dedicating excessive time to their training routine. The condensed yet effective nature of Super Slow Training ensures a productive workout in minimal time.

How to Perform Super Slow Exercises

Super Slow exercises involve slow, controlled movements, typically 10 seconds concentric and 6 seconds eccentric, performed with full engagement and minimal rest between sets for optimal effectiveness.

Proper Form and Technique

Proper form and technique are critical in Super Slow Strength Training to ensure safety, effectiveness, and maximum muscle engagement. Each exercise should be performed with controlled, precise movements, avoiding any jerky or bouncy actions. The slow tempo, typically 10 seconds for the concentric phase and 6 seconds for the eccentric phase, requires focused attention to maintain proper form throughout the entire range of motion. Engage the target muscles intentionally, avoiding reliance on momentum or secondary muscles. Full muscle contraction and elongation are essential to stimulate growth and strength gains. Proper breathing is also vital; exhale during the effort phase and inhale during the return phase. Maintaining proper form ensures that the intended muscle groups are effectively targeted, reducing the risk of injury and optimizing results. A certified instructor can help refine technique, especially for beginners, to maximize the benefits of Super Slow Training.

Recommended exercises and equipment

Recommended Exercises and Equipment

Super Slow Strength Training emphasizes compound exercises that work multiple muscle groups simultaneously, enhancing efficiency and effectiveness. Recommended exercises include squats, deadlifts, bench presses, rows, and overhead presses, which target major muscle groups. These exercises can be performed using free weights, such as barbells or dumbbells, or with machines designed for controlled movements. Resistance bands are also a versatile and portable option for those who prefer minimal equipment. The focus is on basic, functional movements that promote overall strength and muscle development. For equipment, high-quality tools that allow smooth, consistent resistance are ideal. Whether using free weights or machines, the key is to prioritize proper form and controlled tempos to maximize results and safety. This approach ensures a well-rounded and effective workout regimen.

Breathing and Focus During Workouts

Proper breathing and mental focus are critical components of Super Slow Strength Training. The slow tempo requires controlled breathing to maintain form and maximize muscle engagement. It’s essential to avoid holding your breath, as this can lead to unnecessary tension and discomfort. Instead, exhale during the concentric phase (lifting) and inhale during the eccentric phase (lowering) to maintain a steady rhythm and prevent fatigue. Focus is equally important; concentrate on the muscle being worked to ensure proper activation and minimize the risk of injury. The slow, deliberate movements demand attention and intention, making mindfulness a key aspect of this training method. By combining controlled breathing with focused attention, you can optimize the effectiveness of each exercise and achieve greater results in less time.

Workout Routines and Schedules

Super Slow Strength Training typically involves 2-3 short sessions per week, with each workout lasting 20-30 minutes. Full-body routines focus on compound exercises for efficiency and time savings.

Sample Full-Body Routine

A sample Super Slow Strength Training full-body routine includes 6 exercises targeting major muscle groups, completed in 20 minutes. Start with a 5-minute warm-up, followed by 5 minutes of stretching. The routine includes leg presses, chest presses, rows, shoulder presses, lat pulldowns, and core exercises. Each exercise is performed with slow, controlled movements, typically 10 seconds concentric and 6 seconds eccentric. This approach ensures maximum muscle engagement and efficiency. The routine is designed to be time-effective, focusing on compound movements that work multiple muscle groups simultaneously. By minimizing rest periods and emphasizing proper form, individuals can achieve significant strength gains and muscle development in a concise workout session. This structured approach makes Super Slow Training ideal for those seeking efficient and effective full-body conditioning.

Split Routines for Targeted Muscle Groups

Split routines in Super Slow Strength Training allow for targeted focus on specific muscle groups, enhancing intensity and recovery. A common approach is to divide workouts into upper and lower body days. For example, dedicate one session to exercises like chest presses, rows, and shoulder presses, while another focuses on leg presses, curls, and core work. This method enables greater volume and attention to detail for each muscle group. By concentrating on fewer exercises per session, individuals can maximize time under tension and progressive overload. Split routines are particularly beneficial for intermediate trainees seeking advanced muscle development. They also offer flexibility, as workouts can be tailored to individual goals and schedules. Incorporating Super Slow principles ensures each exercise is performed with optimal form and intensity, leading to efficient and targeted strength gains. This structured approach helps avoid overtraining while promoting balanced development.

Frequency and Duration Recommendations

Super Slow Strength Training typically recommends 2–3 sessions per week, with each workout lasting 20–30 minutes. This frequency allows for adequate recovery time, essential for muscle growth and strength gains. Full-body routines are often performed twice weekly, while split routines may require more frequent sessions. Rest days are crucial, as they enable the body to adapt and rebuild muscle tissue. Beginners can start with two 30-minute sessions per week, gradually increasing frequency as they become more accustomed to the intensity. Each exercise is performed with slow, controlled movements, ensuring maximum time under tension. Consistency is key, as the method relies on progressive overload to achieve results. Overtraining is avoided by maintaining a balanced schedule, allowing the body to recover fully between sessions. This approach ensures sustained progress and long-term success. Proper planning and adherence to recommended frequencies are vital for optimizing the benefits of Super Slow Strength Training.

Maximizing Results with Super Slow Training

Super Slow Training maximizes results through progressive overload, proper nutrition, and recovery, ensuring sustained muscle growth and strength gains while maintaining focus and mind-muscle connection during workouts.

Progressive Overload and Intensity

Progressive overload is a cornerstone of Super Slow Strength Training, ensuring continuous muscle adaptation and strength gains. By gradually increasing resistance or time under tension, individuals can challenge their muscles more effectively. This method involves reducing rest periods, increasing exercise duration, or incorporating advanced techniques like negative repetitions or partial reps. The slow tempo (e.g., 10 seconds concentric, 6 seconds eccentric) allows for greater intensity without requiring heavy weights, making it accessible yet potent. Proper form and controlled movements are emphasized to maximize muscle engagement and minimize injury risk. Over time, this approach fosters significant improvements in muscular strength and endurance, even with minimal equipment. The key is consistency and gradual progression, ensuring the body is consistently challenged to adapt and grow.

Nutrition and Recovery Strategies

Proper nutrition and recovery are vital for maximizing the benefits of Super Slow Strength Training. A balanced diet rich in protein, carbohydrates, and healthy fats supports muscle repair and growth. Adequate hydration is essential to maintain muscle function and recovery. Post-workout nutrition should include a mix of protein and carbohydrates to replenish energy stores and promote muscle synthesis. Additionally, sufficient sleep and rest are critical for recovery, as muscles repair and adapt during rest periods. Managing inflammation through anti-inflammatory foods and supplements can also enhance recovery. A well-planned nutrition strategy ensures the body has the necessary resources to adapt to the demands of Super Slow Training, optimizing strength gains and overall progress; Consistency in both training and nutrition is key to achieving long-term success in this method.

Mind-Muscle Connection and Focus

The mind-muscle connection is a critical component of Super Slow Strength Training, as it enhances the effectiveness of each exercise. By focusing on the contraction and relaxation of specific muscle groups, individuals can maximize muscle fiber activation, leading to greater strength gains. This heightened awareness ensures that the target muscles are engaged optimally, reducing the risk of injury and improving overall training efficiency. Maintaining focus throughout the slow, controlled movements requires mental discipline, which is equally important as physical execution. Proper breathing techniques and concentration on form further amplify the mind-muscle connection, allowing for a more productive and safe workout experience. Cultivating this mental focus not only improves the quality of each repetition but also accelerates progress in strength and muscle development over time.

Super Slow Strength Training offers a safe, effective, and time-efficient method to build strength and muscle, making it a valuable approach for long-term fitness and health.

Super Slow Strength Training emphasizes slow, controlled movements to maximize muscle engagement and efficiency. It involves performing exercises with a focus on time under tension, typically 10 seconds concentric and 6 seconds eccentric. This method promotes significant strength gains and muscle growth while reducing injury risk. Proper form and technique are paramount, ensuring workouts are both safe and effective. The approach is time-efficient, requiring only 2-3 sessions per week, making it ideal for those with busy schedules. By focusing on compound movements and progressive overload, Super Slow Training optimizes results while minimizing wear and tear on joints. Its adaptability to various equipment, including bodyweight and machines, makes it accessible for all fitness levels. Overall, it stands out as a sustainable and effective way to achieve long-term strength and health goals.

Encouragement and Next Steps

Embrace Super Slow Strength Training as a transformative approach to building strength and improving overall health. With its focus on slow, controlled movements, this method is both efficient and safe, making it ideal for individuals of all fitness levels. Start by incorporating basic compound exercises into your routine, such as squats or chest presses, using either bodyweight or light resistance. Aim for 2-3 sessions per week, gradually increasing intensity as you progress. Track your workouts to monitor improvements in strength and muscle growth. Stay consistent, and you’ll experience enhanced joint health and a stronger, leaner physique over time. Remember, patience and dedication are key to maximizing results. Take the next step today and begin your journey toward a healthier, stronger you with Super Slow Strength Training!

Final Tips for Success

To achieve optimal results with Super Slow Strength Training, prioritize proper form and controlled movements throughout each exercise. Focus on engaging the target muscles fully to maximize strength gains and prevent injury. Incorporate a consistent warm-up routine to prepare your muscles and joints for the workout, and finish with a cool-down to aid recovery. Maintain a balanced diet rich in protein and nutrients to support muscle growth and energy levels. Ensure adequate rest between sessions, as recovery is crucial for progress. Gradually increase resistance or intensity to continue challenging your muscles, but avoid sacrificing form for heavier weights. Stay mentally focused during workouts, concentrating on the muscle contractions and slow tempos. Finally, track your progress regularly to stay motivated and adjust your routine as needed. Consistency and patience are key to long-term success in Super Slow Strength Training.

singer 4423 instruction manual

Overview of the Singer 4423 Sewing Machine

The Singer 4423 is a heavy-duty sewing machine designed for durability and versatility‚ ideal for sewing heavy fabrics like denim and canvas. It features a robust metal frame‚ powerful motor‚ and advanced stitching capabilities‚ making it suitable for both home use and small-scale professional projects. The machine comes with a comprehensive instruction manual that guides users through setup‚ operation‚ and maintenance‚ ensuring optimal performance and longevity. Its ease of use and reliability make it a popular choice among sewists of all skill levels.

1.1 Model Specifications

The Singer 4423 Heavy Duty Sewing Machine features a robust metal frame and powerful motor‚ capable of sewing up to 1‚100 stitches per minute. It includes 23 built-in stitches‚ a one-step buttonhole‚ and a variety of presser feet for versatile sewing tasks. Designed for heavy-duty use‚ it handles thick fabrics like denim and canvas with ease; The machine weighs approximately 14.5 pounds‚ making it portable yet sturdy. Its dimensions are compact‚ fitting well in home sewing spaces. The Singer 4423 is compatible with a range of accessories‚ including zipper‚ buttonhole‚ and blind hem feet‚ enhancing its functionality for both beginners and experienced sewists.

1.2 Target Audience

The Singer 4423 Heavy Duty Sewing Machine is designed for sewists of all skill levels‚ from beginners to experienced crafters. Its versatility makes it ideal for home sewers‚ hobbyists‚ and small-scale professionals. The machine is particularly suited for those who work with heavy fabrics like denim‚ canvas‚ and leather. Its durability and ease of use also appeal to DIY enthusiasts and seamstresses who prioritize reliability and performance. Whether for repairs‚ upholstery‚ or creating custom projects‚ the Singer 4423 caters to a wide range of sewing needs‚ making it a practical choice for anyone seeking a robust and user-friendly sewing machine.

1.3 Key Features

The Singer 4423 Heavy Duty Sewing Machine boasts a robust metal frame‚ ensuring durability and stability during operation. It features a powerful motor capable of sewing through thick fabrics with ease. The machine includes 23 built-in stitches‚ offering versatility for various sewing projects. Additional features like a free-arm design and drop feed allow for easier handling of complex tasks such as quilting and embroidery. Its heavy-duty construction and user-friendly interface make it suitable for both home and professional use. The machine also comes with a comprehensive instruction manual‚ guiding users through its features and maintenance‚ ensuring optimal performance and longevity.

Setting Up the Singer 4423 Sewing Machine

Setting up the Singer 4423 involves unpacking‚ inspecting parts‚ and following safety guidelines. The instruction manual provides detailed steps for assembly and initial configuration‚ ensuring smooth operation.

2.1 Unpacking and Initial Inspection

Carefully unpack the Singer 4423 sewing machine and inspect for any damage. Ensure all accessories‚ like the power cord‚ bobbin‚ and presser feet‚ are included. Check the machine’s exterior for scratches or dents. Verify that the stitch selector‚ tension dials‚ and other controls are intact. Before plugging in‚ ensure the power cord is undamaged. Familiarize yourself with the machine’s parts using the manual’s diagrams. If any components are missing or damaged‚ contact Singer support immediately. Proper inspection ensures safe and efficient operation. Always follow the manual’s guidelines for setup and use.

2.2 Understanding the Machine Parts

Familiarize yourself with the Singer 4423’s components to ensure proper operation. Key parts include the stitch selector‚ tension dials‚ bobbin case‚ and presser feet. The stitch selector allows you to choose from various stitch patterns‚ while the tension dials control thread tightness. The bobbin case holds the lower thread‚ and presser feet guide fabric movement. Locate the power switch‚ handwheel‚ and reverse stitch lever for basic controls. Refer to the manual’s diagrams for detailed descriptions of each part. Understanding these components helps you operate the machine effectively and troubleshoot issues. Always use the manual as a reference for identifying and using each part correctly.

2.3 Safety Guidelines

To ensure safe operation‚ read and follow all safety guidelines in the Singer 4423 instruction manual. Always use genuine Singer parts and accessories to maintain machine performance. Avoid wearing loose clothing or jewelry that could get caught in moving parts. Keep children and pets away while sewing. Never insert objects into openings or touch hot surfaces. Ensure the machine is placed on a stable‚ flat surface. Disconnect the power cord when not in use or during maintenance. Follow all warnings and precautions outlined in the manual to prevent accidents and ensure optimal performance. Regularly inspect the machine for damage. Refer to the manual for detailed safety information.

Reading the Singer 4423 Instruction Manual

Reading the Singer 4423 instruction manual is essential for understanding machine operations‚ safety guidelines‚ and troubleshooting. It provides detailed explanations of features‚ parts‚ and maintenance. Available for free download in PDF format‚ the manual ensures users can access critical information anytime. By following the manual‚ sewists can optimize performance‚ prevent errors‚ and extend the machine’s lifespan. Regular updates and online resources further enhance the user experience‚ making it a vital resource for both beginners and experienced sewists.

3.1 Importance of the Instruction Manual

The Singer 4423 instruction manual is crucial for maximizing machine performance and ensuring safety. It provides detailed guidance on setup‚ operation‚ and maintenance‚ helping users avoid common mistakes. The manual includes troubleshooting tips and parts lists‚ enabling quick resolution of issues. By following the manual‚ users can extend the machine’s lifespan and maintain its efficiency. Available in PDF format‚ it offers convenience for reference anytime. Adhering to the manual’s guidelines ensures optimal sewing results and prevents potential damage to the machine. Regularly reviewing the manual helps users stay informed about best practices and safety precautions. It is an indispensable resource for all users.

3.2 Navigating the Manual

The Singer 4423 instruction manual is organized to help users easily find information. It begins with a table of contents and an index‚ allowing quick access to specific topics. The manual is divided into clear sections‚ such as setup‚ operation‚ and troubleshooting‚ with detailed diagrams and illustrations. Each section is numbered for easy navigation‚ and key terms are highlighted for quick reference. Users can locate parts lists‚ safety guidelines‚ and stitch charts effortlessly. The logical flow ensures that even complex tasks‚ like threading or bobbin winding‚ are explained step-by-step. This structure makes the manual user-friendly and accessible for sewists of all skill levels.

3.3 Symbols and Terminology

The Singer 4423 manual uses specific symbols and terminology to guide users effectively. Symbols like warning signs indicate safety precautions‚ while diagram keys explain parts and functions. Terms such as bobbin‚ presser foot‚ and stitch width are defined to ensure clarity. The manual also includes a glossary of sewing-related terms‚ helping users understand technical language. By standardizing these symbols and terms‚ the manual ensures consistency and ease of understanding. This section is crucial for new users to decode instructions and operate the machine confidently; Proper familiarity with these elements enhances safety and efficiency while sewing.

Basic Operations

The Singer 4423 manual details essential steps for threading‚ bobbin winding‚ and stitch selection‚ ensuring smooth operation. These processes are fundamental for beginners and experienced users alike.

4.1 Threading the Machine

Threading the Singer 4423 is a straightforward process outlined in the manual. Begin by turning the handwheel to raise the take-up lever. Place the thread through the upper tension disc‚ then guide it through the channel and take-up lever. Next‚ thread the needle from front to back. Ensure the thread is seated properly in the tension spring. Finally‚ pull the thread gently to test the tension. Proper threading is essential for even stitching and prevents thread breakage during sewing. Always refer to the manual for visual guides to avoid common mistakes.

4.2 Winding the Bobbin

Winding the bobbin for the Singer 4423 is a simple process. Start by placing the thread on the spool pin and guide it through the bobbin winder. Engage the bobbin winder mechanism and gently start the machine to wind the thread evenly. Stop when the bobbin is full‚ then cut the excess thread. Ensure the bobbin is properly seated in the bobbin case before use. Always use the correct type of bobbin (Class 15) for the Singer 4423. Proper winding ensures smooth stitching and prevents thread tangles. Refer to the manual for visual guides to avoid common mistakes during this process.

4.3 Selecting Stitches

The Singer 4423 offers a variety of stitches‚ including straight‚ zigzag‚ and decorative options‚ to suit different sewing projects. To select a stitch‚ turn the stitch dial to the desired pattern or use the stitch selector button. Refer to the stitch chart on the machine or in the manual for guidance. Always match the stitch type to the fabric and project needs. Use the backstitch feature at the start and end of seams for secure stitching. Proper stitch selection enhances the quality and durability of your work. This feature-rich system makes the Singer 4423 versatile for both basic and advanced sewing tasks.

Advanced Features of the Singer 4423

The Singer 4423 features a variety of stitch options‚ including straight‚ zigzag‚ and decorative stitches. To select a stitch‚ simply turn the stitch dial or press the stitch selector button. Always refer to the stitch chart on the machine or in the manual for guidance. Choose the appropriate stitch based on fabric type and project requirements. Use the backstitch feature at the start and end of seams for added security. Proper stitch selection ensures professional-looking results and enhances the durability of your work. This feature makes the Singer 4423 ideal for both basic and advanced sewing tasks.

5.1 Heavy-Duty Sewing Capabilities

The Singer 4423 excels in heavy-duty sewing‚ featuring a robust metal frame and powerful motor designed to handle thick fabrics like denim‚ canvas‚ and leather. With a maximum stitch speed of 1‚100 stitches per minute‚ it efficiently sews through multiple layers of heavy materials. The machine is equipped with a heavy-duty stitching system‚ ensuring strong and durable seams. Its advanced gear system provides consistent power‚ making it ideal for demanding projects. Always use the appropriate heavy-duty needles and presser feet as recommended in the manual to maintain performance and prevent damage. This capability makes the Singer 4423 a reliable choice for professionals and home users alike.

5.2 Free-Arm Sewing

The Singer 4423 offers free-arm sewing‚ enabling easy stitching of cylindrical or hard-to-reach areas like sleeves‚ pant legs‚ and small crafts. By detaching the flatbed‚ users gain access to the free arm‚ providing a large‚ unobstructed workspace. This feature is particularly useful for precision sewing‚ allowing better control over fabric movement; The machine’s free-arm design is ideal for sewing delicate or curved projects‚ such as collars‚ cuffs‚ and children’s clothing. Refer to the instruction manual for guidance on how to engage free-arm mode and optimize your sewing experience for various fabric types and creative projects. This versatility enhances both convenience and creativity.

5.3 Using the Built-In Stitches

The Singer 4423 comes with a variety of built-in stitches‚ including straight‚ zigzag‚ and decorative options‚ designed to cater to diverse sewing needs. Users can easily select stitches using the machine’s dial or button controls‚ as detailed in the instruction manual. These stitches are ideal for sewing heavy fabrics‚ reinforcing seams‚ and adding decorative elements to projects. The machine’s heavy-duty construction ensures consistent stitch quality‚ even on thick materials. By following the manual’s guidance‚ users can maximize the potential of these stitches to achieve professional-grade results in both practical and creative sewing tasks. This feature enhances versatility and creativity for sewists of all levels.

Maintenance and Care

Regular maintenance ensures the Singer 4423’s optimal performance. Clean the machine‚ oil moving parts‚ and inspect for wear and tear to extend its lifespan and reliability.

6.1 Cleaning the Machine

Regular cleaning is essential to maintain the Singer 4423’s performance. Turn off and unplug the machine before cleaning. Use a soft brush to remove lint and debris from the bobbin area‚ tension discs‚ and under the stitch plate. Dampen a cloth with water or sewing machine oil to wipe down exterior surfaces‚ avoiding harsh chemicals. Pay special attention to areas around the needle and feed dogs‚ where dust and thread fragments often accumulate. Cleaning ensures smooth operation and prevents damage from built-up residue. Refer to the manual for detailed cleaning instructions and recommendations.

6.2 Oiling the Machine

Regular oiling is crucial for the Singer 4423’s smooth operation and longevity. Use only Singer-recommended sewing machine oil to lubricate internal components. Locate the oiling points as indicated in the manual‚ typically near the bobbin area and hook race. Apply a few drops of oil periodically‚ ensuring not to over-lubricate‚ as excess oil can attract dust and cause issues. Turn the handwheel gently to distribute the oil evenly. Oiling prevents friction‚ reduces wear‚ and maintains stitch quality. Refer to the manual for specific oiling intervals and instructions to keep your machine running efficiently and reliably over time.

6.3 Checking for Wear and Tear

Regularly inspect the Singer 4423 for wear and tear to ensure optimal performance. Check the bobbin area‚ feed dogs‚ and tension discs for signs of damage or debris. Examine the needle‚ presser foot‚ and belts for excessive wear. Lubricate moving parts as needed and replace worn components promptly. Clean the machine thoroughly to prevent dust buildup‚ which can cause mechanical issues. Refer to the manual for specific inspection points and maintenance schedules. Addressing wear and tear early helps maintain stitch quality and prevents costly repairs‚ ensuring your machine runs smoothly for years. Always use genuine Singer replacement parts for reliability.

Troubleshooting Common Issues

The Singer 4423 instruction manual includes a detailed troubleshooting guide to help identify and resolve common issues‚ ensuring smooth operation and extending the machine’s lifespan effectively.

7.1 Thread Breakage

Thread breakage is a common issue that can occur due to improper threading‚ incorrect tension settings‚ or using low-quality thread. To resolve this‚ ensure the machine is threaded correctly‚ following the manual’s guidelines. Check the tension discs and adjust them as needed to maintain even tension. Using high-quality‚ compatible threads recommended by Singer can also prevent frequent breakage. Regularly cleaning the machine and ensuring the needle is properly inserted can further minimize this issue. Refer to the troubleshooting section of the manual for detailed steps to diagnose and fix thread breakage effectively. Proper maintenance ensures smooth sewing operations.

7.2 Uneven Stitching

Uneven stitching can occur due to incorrect tension settings‚ improper threading‚ or a misaligned needle. To address this‚ check the thread tension and adjust it as per the manual’s instructions. Ensure the needle is properly inserted and aligned. If the issue persists‚ consult the troubleshooting section of the Singer 4423 manual for guidance. Regularly cleaning the machine and using high-quality threads can also help maintain consistent stitching. Always refer to the manual for specific adjustments to achieve smooth‚ even stitching and prevent further complications during your sewing projects. Proper maintenance ensures optimal performance and desired results.

7.3 Bobbin Problems

Bobbin issues‚ such as improper threading or misalignment‚ can disrupt stitching. If the bobbin is not correctly inserted or the thread is tangled‚ uneven stitching or thread breakage may occur. To resolve this‚ ensure the bobbin is properly seated and aligned with the machine’s bobbin case. Regularly clean the bobbin area to remove lint or debris. If the problem persists‚ refer to the Singer 4423 manual’s troubleshooting guide for detailed steps. Using genuine Singer parts and following the manual’s maintenance tips can help prevent future bobbin-related issues and ensure smooth sewing operations. Always follow the manual’s recommendations for optimal performance.

Accessories and Replacement Parts

The Singer 4423 supports various accessories‚ including additional presser feet and needles‚ to enhance sewing capabilities. Genuine Singer parts ensure optimal performance and longevity.

8.1 Compatible Accessories

The Singer 4423 is compatible with a variety of accessories that enhance its functionality. These include heavy-duty needles‚ walking feet‚ and specialized presser feet for tasks like zippers and buttonholes. Additional attachments such as extension tables and storage cases are also available. Using genuine Singer accessories ensures compatibility and optimal performance. The instruction manual provides a detailed list of recommended parts and where to purchase them. Always check for compatibility before buying to maintain your machine’s efficiency and extend its lifespan. Genuine Singer parts are designed to meet high standards‚ ensuring durability and reliability.

8.2 Ordering Replacement Parts

To maintain your Singer 4423 sewing machine’s performance‚ genuine replacement parts are essential. The instruction manual includes a detailed parts list with descriptions and part numbers. Visit Singer’s official website or authorized dealers to order replacement parts. Sewing Parts Online and other trusted retailers also offer compatible components. Always verify the authenticity of parts to ensure compatibility and quality. For convenience‚ Many retailers offer online ordering with shipping directly to your home. When ordering‚ use the part numbers from your manual to avoid errors. Genuine Singer parts ensure optimal performance and extend the machine’s lifespan. Promptly address any issues to maintain functionality.

8.3 Using Genuine Singer Parts

Using genuine Singer parts ensures optimal performance and longevity of your Singer 4423 sewing machine. The instruction manual emphasizes the importance of authentic components for compatibility and reliability. Genuine parts are specifically designed to meet the machine’s specifications‚ guaranteeing smooth operation and preventing potential damage. Non-Singer parts may void the warranty and lead to mechanical issues. Always refer to the parts list in the manual when ordering replacements. For authenticity‚ purchase directly from Singer’s official website or authorized dealers. This ensures your machine continues to deliver the quality and durability you expect. Regularly check for updates or recalls on Singer’s customer support page.

Singer 4423 Instruction Manual Download

The Singer 4423 instruction manual is available for free download in PDF format‚ ensuring easy access to guidance for setup‚ operation‚ and troubleshooting. Users can find it on Singer’s official website or through authorized dealers without registration. The manual is provided in multiple languages‚ including English‚ Russian‚ and Italian‚ catering to a diverse user base. Downloading the manual allows sewists to reference instructions anytime‚ ensuring optimal use of their Singer 4423 sewing machine. This convenience enhances the overall sewing experience.

9.1 Finding the Manual Online

Locating the Singer 4423 instruction manual online is straightforward. Visit Singer’s official website or authorized dealers to access the PDF file for free. Sewing communities and forums also provide direct links to download the manual without registration. Ensure you use trusted sources to avoid outdated or incorrect versions. The manual is available in multiple languages‚ including English‚ Russian‚ and Italian‚ to cater to a global audience. Additionally‚ it can be downloaded in formats like PDF or TXT‚ making it easily accessible on various devices. This ensures users can reference the guide anytime‚ enhancing their sewing experience.

9.2 Downloading in PDF Format

Downloading the Singer 4423 instruction manual in PDF format is a quick and convenient process. The PDF file is available on Singer’s official website‚ authorized dealer pages‚ and trusted sewing forums. Ensure you download from verified sources to guarantee authenticity and safety. The PDF format allows for easy navigation‚ including bookmarks and search functionality‚ making it simple to locate specific sections. With a file size of approximately 1.04 MB‚ it downloads swiftly‚ even on slower connections. The PDF manual is compatible with all major devices‚ ensuring accessibility anytime‚ anywhere. This format preserves the manual’s layout and clarity‚ providing a seamless reading experience.

9.3 Printing the Manual

Printing the Singer 4423 instruction manual from the PDF file is straightforward. Use a standard printer with A4 or letter-sized paper for optimal results. Ensure the printer settings are configured for high-quality text and images to maintain clarity. For better readability‚ print in color if possible‚ as the manual includes diagrams and illustrations. Consider printing only the sections you need‚ such as troubleshooting or maintenance‚ to save paper. If desired‚ bind the pages for a professional finish. Singer’s customer support also offers physical copies upon request‚ ensuring you have a hardcopy for easy reference. This makes the manual accessible offline and convenient for everyday use.

Singer Customer Support

Singer offers comprehensive customer support‚ including phone‚ email‚ and live chat services. Their website provides FAQs‚ video tutorials‚ and downloadable resources to assist with any queries or issues.

10.1 Contacting Singer Support

To contact Singer support‚ visit their official website and navigate to the “Support” section. Here‚ you can find contact details‚ including phone numbers‚ email addresses‚ and live chat options. The support team is available to assist with troubleshooting‚ warranty claims‚ and general inquiries. Additionally‚ Singer provides a comprehensive FAQ section and downloadable resources like manuals and guides. For urgent issues‚ calling their customer service hotline is recommended. Ensure to have your machine model number‚ such as Singer 4423‚ ready for efficient assistance. This streamlined process ensures quick resolution to any queries or concerns. Singer’s dedicated support team is committed to helping you maximize your sewing experience.

10.2 Warranty Information

The Singer 4423 sewing machine is backed by a 25-year limited warranty on parts and labor‚ with 2 years on electrical components and 1 year on belts. To activate the warranty‚ register your machine online within 30 days of purchase. The warranty covers defects in materials and workmanship under normal use. However‚ it does not apply to damage caused by misuse‚ neglect‚ or improper maintenance. For warranty claims‚ contact Singer support with your proof of purchase and machine serial number. Regular maintenance‚ as outlined in the instruction manual‚ ensures warranty validity and optimal performance. Singer’s warranty provides peace of mind for your sewing investment.

10.3 Online Resources

Singer offers extensive online resources to support the 4423 sewing machine. Users can download the PDF instruction manual directly from Singer’s official website. Additionally‚ Singer provides tutorial videos‚ FAQs‚ and troubleshooting guides to address common issues. The Singer website also features a dedicated section for software updates and stitch guides. For further assistance‚ Singer’s customer support is accessible via live chat‚ email‚ or phone. These resources ensure that users can fully utilize their machine’s features and resolve any challenges efficiently. Singer’s online platform is a comprehensive hub for all user needs‚ enhancing the sewing experience.

Community and User Resources

The Singer 4423 sewing machine is supported by an active community of users who share tips‚ projects‚ and troubleshooting advice online. Sewing forums‚ social media groups‚ and YouTube channels offer tutorials and reviews‚ enhancing the sewing experience for both beginners and experts. These resources complement the official manual‚ providing real-world insights and creative inspiration for maximizing the machine’s capabilities.

11.1 Sewing Communities

Sewing communities provide invaluable support and inspiration for Singer 4423 users. Online forums‚ Facebook groups‚ and Reddit threads dedicated to sewing machines offer platforms for sharing tips‚ projects‚ and troubleshooting advice. These communities are rich with user-generated content‚ including tutorials and creative ideas tailored to the Singer 4423. Members often discuss their experiences‚ providing real-world insights and solutions to common challenges. Whether you’re a beginner or an advanced sewer‚ these communities foster learning and collaboration‚ helping you make the most of your machine. They complement the official manual by offering practical‚ community-driven guidance and inspiration for your sewing journey.

11.2 User Reviews

User reviews of the Singer 4423 highlight its durability and versatility‚ with many praising its ability to handle heavy fabrics effortlessly. Sewists appreciate the machine’s robust construction and smooth operation‚ making it ideal for both casual and intensive projects. Positive feedback often mentions the ease of use‚ even for beginners‚ and the wide range of built-in stitches. Some users note that the machine’s weight adds stability‚ reducing vibrations during use. While a few mention a steeper learning curve for advanced features‚ overall satisfaction is high‚ with many recommending it for its reliability and value. Reviews also emphasize the importance of following the manual for optimal performance.

11.3 Tutorials and Videos

Tutorials and videos for the Singer 4423 provide visual guidance‚ complementing the instruction manual. Official Singer channels and third-party creators offer step-by-step demonstrations‚ covering basic operations‚ advanced features‚ and troubleshooting. These resources are particularly helpful for users who prefer hands-on learning or need clarification on specific functions. Videos often include tips for optimizing stitch quality‚ maintaining the machine‚ and resolving common issues. Many tutorials are designed for sewists of all skill levels‚ making the Singer 4423 more accessible. They serve as a valuable supplement to the manual‚ offering real-time problem-solving and enhancing the overall sewing experience.

classic eq leveling guide

Classic EQ leveling offers a challenging yet rewarding experience, requiring strategic planning and in-depth knowledge of zones, quests, and class dynamics․ This guide provides essential tips and insights to help players navigate the early game, optimize their progression, and master the fundamentals of leveling in EverQuest․

Overview of the Leveling Process

The leveling process in Classic EQ is a meticulous journey from level 1 to 60, requiring careful planning and strategy․ Players must select optimal zones for their level, complete essential quests, and manage resources efficiently․ Grouping with others can significantly enhance XP gain and tackle challenging content․ As players progress, they’ll uncover class-specific quests and milestones that shape their character’s development․ This guide provides insights into the best practices for navigating each stage, ensuring a smooth and efficient progression through Norrath․

Best Classes for Leveling

Choosing the right class is crucial for efficient leveling in Classic EQ․ Necromancers and Clerics excel due to their pets and healing capabilities, making soloing easier․ Magicians and Enchanters shine in groups with their high damage output and crowd control․ Rangers and Druids offer versatility with melee and spellcasting, while Paladins and Shadow Knights provide strong defense and offense․ Each class has unique strengths, so selecting one that fits your playstyle ensures a smoother journey․ This guide highlights the best classes for both solo and group play, helping you maximize your leveling experience in Norrath․

Starting Zones for New Players

New players begin in their race-specific starting zones, such as the Karanas, offering safety and early quests․ These areas provide essential experience and initial gear․

Best Starting Zones by Race

Each race in Classic EQ begins in a unique starting zone tailored to their lore․ Humans start in the bustling city of Qeynos, offering access to essential quests and trainers․ Barbarians begin in the rugged mountains of Halas, surrounded by ice and wolves․ Elves start in the serene forest of Felwithe, with abundant low-level mobs․ Dwarves emerge in the sturdy fortress of Kaladim, ideal for crafting and early combat․ Half-Elves begin in the shared city of Felwithe, blending elven and human influences․ These zones provide a safe environment for new players to gain experience and gather initial gear․

Early Quests and NPCs

Engaging with early quests and NPCs is crucial for swift leveling․ Quests like bone chip hand-ins and Gnoll Fang collections provide valuable experience and items․ Starting zones feature key NPCs, such as Captain Tillin in Qeynos, who offer quests that aid progression․ Completing these early tasks ensures a strong foundation for your character, equipping them with essential gear and skills․ Prioritize quest completion to maximize efficiency and set yourself up for success in higher levels․ These initial interactions also introduce you to the game’s rich lore and mechanics, making them indispensable for new players․

Leveling from 1 to 10

Leveling from 1 to 10 in Classic EQ involves starting in your home city, completing newbie quests, and killing mobs like bears, spiders, and gnolls․ Transition to zones like Blackburrow at level 6 for better loot and XP․ Essential quests, such as bone chip hand-ins, provide early boosts․ Focus on building a solid foundation for stats and skills to prepare for higher levels efficiently․

Essential Tips for Early Levels

Starting strong in Classic EQ requires focus on efficient leveling․ Begin by completing newbie quests in your home city to gain early experience and equipment․ Always manage your gold wisely, as vendor trash can add up quickly․ Focus on killing mobs like bears, spiders, and gnolls until level 6, then transition to zones like Blackburrow for better loot․ Don’t neglect resource management—keep enough arrows, potions, and food․ Grouping with others can accelerate XP gain, but soloing is viable with careful pulling․ Avoid unnecessary deaths to prevent XP loss․ Use abilities wisely and stay alert for quest drops that boost progression․

Key Quests for Levels 1-10

Completing specific quests in early levels significantly boosts XP and gear․ Start with newbie quests in your home city for initial rewards․ Quests like Crushbone belts, gnoll fangs, and bone chip hand-ins provide excellent XP and items․ In Blackburrow, focus on rusty weapon drops and related quests for early upgrades․ Don’t overlook quests for trivial items, as they often yield surprising rewards․ Keep inventory light to avoid slowing down and prioritize quests that align with your leveling path․ Completing these early quests lays a strong foundation for smoother progression through higher levels․

Mid-Range Levels (10-30)

Levels 10-30 offer diverse zones like Karanas, Qeynos Hills, and Runnyeye, providing balanced XP and quests․ Focus on efficient mob grinding and explore dungeon opportunities for better loot and faster progression․

Optimal Zones for Levels 10-30

For levels 10-30, focus on zones like Blackburrow, City of Mist, and Misty Thicket․ Blackburrow offers excellent quests and loot for mid-level players, while City of Mist provides challenging content for higher levels in this range․ Misty Thicket is ideal for consistent XP and access to essential supplies․ These zones balance difficulty, quest availability, and XP efficiency, ensuring steady progression․ Transitioning between zones as you level up maximizes growth and prepares you for advanced content ahead․

Grouping Strategies

Grouping in Classic EQ significantly enhances XP gain and survival․ Form balanced parties with a tank, healer, and DPS classes․ Coordinate roles to maintain aggro control and minimize wipes․ Communicate effectively to execute strategies smoothly․ Use pullers to manage mob aggro, ensuring the tank holds it․ Healers must prioritize keeping the group alive, while DPS focuses on maximizing damage output․ Grouping also provides access to higher-level content and better loot․ Maintain a cohesive team dynamic to tackle challenging zones and dungeons efficiently, ensuring steady progression through the mid-level range․

Advanced Levels (30-60)

Reaching levels 30-60 in Classic EQ demands mastering high-level zones like Karnor’s Castle or Skyfire Mountains․ Complex quests and tougher enemies require strategic grouping and optimal gear preparation․

High-Level Zones and Dungeons

Advanced leveling in Classic EQ involves exploring high-level zones such as Karnor’s Castle, Skyfire Mountains, and the Plane of Mischief․ These areas offer challenging mobs and lucrative loot but require careful preparation․ Dungeons like Nagafen’s Lair and the Sebilis Temple provide unique rewards but demand coordinated groups․ Players should focus on acquiring gear from these zones to tackle tougher content․ Strategic grouping and effective communication are crucial for success․ High-level zones also introduce complex mechanics and rare spawns, adding depth to the leveling experience․ Mastery of these areas is essential for reaching the endgame efficiently․

Endgame Preparation Tips

Preparing for the endgame in Classic EQ requires strategic planning and optimization․ Focus on upgrading your gear through high-level zones and dungeons, ensuring your equipment is enchanted and optimized for your class․ Organize your inventory and bank to maximize efficiency․ Master your spells and abilities, as endgame content demands precise execution․ Building a strong social network and joining a reliable guild can significantly enhance your progression․ Plan your platinum management to afford essential items and expansions․ Stay updated on game changes and expansion content to maintain a competitive edge․ Effective preparation ensures a smoother transition into the challenging endgame environment․

Grouping and Social Dynamics

Grouping enhances leveling efficiency and fosters social bonds․ Collaborate with others to tackle challenging content, share strategies, and achieve shared objectives․ Effective communication and teamwork are crucial for success․

Benefits of Grouping

Grouping in Classic EQ significantly enhances leveling efficiency by allowing players to tackle tougher content, share loot, and benefit from complementary skills․
Healers and tanks provide sustainability, reducing downtime and death penalties․
Coordinated groups can achieve higher XP rates and complete complex quests․
Social interaction fosters camaraderie and shared strategies, enriching the gameplay experience․
Effective teamwork also helps manage challenging encounters, reducing frustration and improving overall progression․
Grouping is a cornerstone of Classic EQ’s design, promoting collaboration and mutual success․

Effective Communication

Effective communication is crucial for success in Classic EQ, fostering teamwork and reducing misunderstandings․
Players should clearly call out mob locations, spell effects, and resource needs․
Using in-game chat or voice tools like Discord enhances coordination․
Establishing a leader ensures unified decision-making and streamlined strategies․
Regular check-ins help maintain group cohesion and address concerns promptly․
Clear communication boosts efficiency, prevents wipes, and strengthens group dynamics․
It ensures all players contribute effectively, making progression smoother and more enjoyable․
Good communication is key to mastering Classic EQ’s challenging content and achieving long-term success․

Crafting and Tradeskills

Crafting and tradeskills are vital for self-sufficiency, enabling players to create gear, potions, and tools․ Blacksmithing, Alchemy, and Tailoring are essential for equipping characters and aiding progression․ Managing resources efficiently ensures consistent crafting without financial strain, while skill progression unlocks higher-tier items․ Balancing crafting with leveling is key to maximizing efficiency and preparing for challenging content ahead․

Important Crafts for Leveling

Key trades like Blacksmithing, Alchemy, and Tailoring are essential for crafting gear and items that aid progression․ Blacksmithing allows for weapon and armor creation, reducing reliance on loot․ Alchemy enables potion-making, providing healing, mana restoration, and buffs․ Tailoring crafts bags and equipment, improving inventory management and character stats․ Each craft requires specific resources, making efficient gathering and planning crucial․ Crafting complements leveling by providing cost-effective solutions and enhancing gameplay versatility․ Balancing crafting time with combat progression ensures a well-rounded approach to character development․ These trades are invaluable for equipping and sustaining characters throughout their journey․

Resource Management

Efficient resource management is crucial for optimal leveling in Classic EQ․ Managing gold, inventory space, and crafting materials ensures you maintain progress without unnecessary delays․ Prioritize selling unwanted loot to vendors to accumulate gold for essential gear and supplies․ Utilize bank space wisely to store valuable items and crafting materials․ Focus on completing quests that offer significant rewards and avoid wasting resources on non-essential items․ Crafting materials like ores, herbs, and furs are valuable, so gather them strategically․ Avoiding unnecessary expenses ensures your resources are allocated toward progression․ Effective resource management enhances your leveling efficiency and overall gameplay experience․

Important Quests and Milestones

Key quests like bone chip hand-ins and Crushbone belts provide significant experience and rewards, while milestones such as reaching level 10 unlock new abilities and zones․

Game-Changing Quests

Several quests in Classic EQ significantly impact leveling efficiency․ The bone chip hand-in quest provides substantial experience and rewards, making it a must-complete for early levels․ Similarly, Crushbone belts and gnoll fangs offer valuable loot and XP․ Quests like these often unlock essential items or abilities, such as better weapons or access to new zones․ Completing these early on can drastically accelerate your progression․ Additionally, quests tied to specific zones, like Blackburrow or Crushbone, often yield rare drops and xp bonuses․ Prioritizing these quests ensures you stay ahead in leveling and gear acquisition․

Class-Specific Quests

Class-specific quests in Classic EQ provide unique benefits tailored to each class, enhancing abilities and progression․ Clerics and Paladins can acquire powerful armor sets through dedicated quests, while Mages gain access to rare spells․ These quests often require specific items or actions, rewarding players with items that boost class performance․ For example, Clerics can obtain the Holy Sceptre of Light, and Enchanters can acquire the Staff of the Serpent․ Completing these quests early not only strengthens your class identity but also provides significant advantages in both solo and group play, making them essential for optimizing your leveling journey․

Managing Your Economy

Effective economy management in Classic EQ involves mastering vendor strategies, price checking, and negotiating deals to maximize gold savings and resource efficiency for optimal leveling․

Gold Management Tips

Managing gold effectively in Classic EQ is crucial for a smooth leveling experience․ Prioritize spending on essential items like weapons, armor, and spells․ Avoid unnecessary purchases and sell unwanted loot to vendors or players․ Utilize the bazaar to buy and sell items at competitive prices․ Completing quests and killing monsters that drop valuable items can significantly boost your gold reserves․ Additionally, consider crafting or trading skills to generate extra income․ Always keep some gold reserved for emergencies or rare opportunities to purchase valuable gear․

Vendor and Merchant Strategies

Optimizing interactions with vendors and merchants is key to maximizing your resources․ Sell unwanted items to vendors regularly to accumulate gold, but prioritize selling rare or high-demand items to players for better profits․ Buy essential supplies like food, arrows, and potions in bulk to save gold․ Use the bazaar to purchase items at competitive prices or sell your loot for a higher return․ Always negotiate with merchants to ensure fair deals․ Avoid overspending on unnecessary items and focus on gear that enhances your leveling efficiency․ Vendor trash can add up, so stay organized and sell frequently to maintain a healthy gold supply․

Classic vs․ Modern EQ Differences

Classic EQ offers a more challenging, slower-paced leveling experience compared to modern versions, emphasizing grouping, strategic planning, and traditional gameplay mechanics that defined the original EverQuest․

Key Differences in Gameplay

Classic EQ features slower leveling, greater reliance on grouping, and challenging gameplay mechanics․ Unlike modern versions, it emphasizes strategic planning, careful resource management, and traditional RPG elements․ Players must navigate complex zones, engage in meaningful quests, and rely on others for progression․ The pacing is deliberate, with XP rates and mob difficulty encouraging collaboration․ Modern EQ, by contrast, offers streamlined leveling, solo-friendly content, and convenience features․ Classic EQ’s gameplay demands patience, adaptation, and a deeper understanding of class roles, making it a more immersive and rewarding experience for those who embrace its nostalgic charm and strategic depth․

Adapting Strategies

Adapting strategies in Classic EQ leveling is crucial for success․ Players must adjust tactics as they progress, shifting from solo play to group dynamics and evolving their character builds․ Zone difficulty varies greatly, requiring flexibility in mob selection and pull strategies․ As levels increase, integrating new abilities and optimizing gear becomes essential․ Collaboration with others enhances efficiency, while soloing demands careful planning․ Remaining adaptable ensures survival and progression, as the game’s challenges escalate․ Learning to pivot strategies based on experience and situational demands is key to mastering Classic EQ’s leveling journey․

Advanced Leveling Tips

Exploit mob AI patterns, optimize XP gain through efficient pulling, and master zone-specific strategies to accelerate leveling․ Proper gear management and ability rotations are crucial for success․

Exp Boosting Techniques

Maximizing XP gain requires strategic techniques such as mob tagging, where multiple players attack the same mob to share XP․ Splitting XP with a group increases efficiency, especially in later levels․ Utilizing fast respawn zones and quest rewards can significantly boost progress․ Single-pulling with a healer or enchanter reduces downtime, allowing for continuous leveling․ Additionally, exploiting mob AI by pulling large groups and using area-effect spells can increase XP per hour․ Proper planning and coordination with your group are key to maximizing these techniques effectively․

Avoiding Common Mistakes

Avoiding common mistakes is crucial for efficient leveling in Classic EQ․ Many players overlook essential quests or fail to optimize their equipment, leading to slower progression․ Others neglect to manage their inventory, causing unnecessary downtime․ Avoid pulling too many mobs at once, as this can lead to wipes․ Additionally, not utilizing group buffs or ignoring exp-sharing splits can hinder XP gain․ Always research zone-specific strategies and keep track of respawn timers to minimize wasted time․ Being mindful of these pitfalls and staying attentive will significantly improve your leveling efficiency and overall enjoyment of the game․

Leveling in Classic EQ is a journey that requires patience, strategy, and dedication․ By mastering the fundamentals, avoiding common mistakes, and leveraging the power of grouping, you’ll efficiently reach the endgame․ Stay updated with the latest community guides and patches, as they often provide valuable insights․ Always keep a positive attitude and embrace the challenges—every wipe is a learning opportunity․ With persistence and the right strategies, you’ll unlock the full potential of your character and enjoy the rich world of EverQuest to the fullest․

dnd character sheet 3.5 pdf

A D&D 3․5 character sheet is a vital tool for tracking stats, skills, and equipment․ Available as PDFs, these sheets simplify character management for players․

Definition and Purpose

A D&D 3․5 character sheet is a digital or physical document designed to organize and track a player’s character details in the Dungeons & Dragons 3․5 edition․ It serves as a comprehensive record of a character’s stats, skills, feats, equipment, spells, and combat-related information․ Available in PDF format, these sheets are fillable, allowing players to input and update their character’s data efficiently․ The primary purpose is to streamline gameplay by providing quick access to critical information, ensuring players and Dungeon Masters can focus on storytelling and strategy․ Whether printed or used digitally, the D&D 3․5 character sheet is an essential tool for managing complex character builds and enhancing the overall gaming experience․

Importance of Character Sheets in D&D 3․5

D&D 3․5 character sheets are indispensable for organizing and managing character details, ensuring players can quickly access vital information during gameplay․ They streamline stat tracking, skill calculations, and inventory management, reducing confusion and saving time․ The availability of PDF versions enhances convenience, allowing players to easily print or use digital versions․ These sheets also promote consistency, ensuring all players follow the same format for tracking abilities and progress․ Their importance lies in enhancing gameplay efficiency and fostering a more immersive experience by keeping the focus on storytelling and strategy rather than administrative tasks․

Key Features of a D&D 3․5 Character Sheet

A standard D&D 3․5 character sheet includes sections for basic information, such as name, race, and class, as well as detailed areas for ability scores, skills, and feats․ It also features compartments for equipment, spells, and combat statistics, ensuring all essential data is organized․ Many PDF versions offer interactive fields, allowing players to fill in details digitally and perform automatic calculations for stats like AC and attack bonuses․ Customizable layouts and themes are common, catering to different playstyles and preferences․ These features make the sheet a comprehensive and practical tool for both players and Dungeon Masters, enhancing gameplay efficiency and immersion․

Evolution of the D&D 3․5 Edition Character Sheet

The D&D 3․5 character sheet evolved from earlier editions, enhancing organization and detail․ It transitioned from paper-based to digital PDF formats, offering fillable forms for convenience and customization․

History of D&D 3․5 Edition

Dungeons & Dragons 3․5 Edition, released in 2003 by Wizards of the Coast, built upon the 3․0 Edition, refining rules and expanding character customization․ It introduced the d20 System, emphasizing tactical combat and detailed character development․ The 3․5 Edition became a cornerstone of tabletop RPGs, praised for its complexity and flexibility․ Its character sheet evolved to include detailed sections for abilities, skills, feats, and equipment, aiding players in managing complex builds․ The edition’s popularity endured even after newer versions were released, with many players and developers creating custom PDF sheets to adapt the system to modern playstyles․ Its legacy influenced later editions and spin-offs, such as Pathfinder, cementing its place in RPG history․

Design Improvements Over Previous Editions

The D&D 3․5 Edition introduced significant design improvements, enhancing clarity and playability․ Compared to earlier versions, it streamlined character creation, offering a more structured approach to selecting races, classes, and feats․ The character sheet was redesigned to be more organized, with dedicated sections for abilities, skills, and equipment, making it easier for players to track their progress․ Additionally, the 3․5 Edition incorporated a more intuitive ruleset, reducing ambiguity and improving gameplay flow․ These changes were reflected in the official PDF character sheets, which became widely popular for their user-friendly layout and comprehensive detail, setting a new standard for RPG character management․

Popular Layouts and Formats

Popular layouts for D&D 3;5 character sheets often feature a clean, organized design to maximize readability and functionality․ Many PDF versions adopt a folio-style layout, spreading content across multiple pages to accommodate detailed sections like spells, equipment, and combat stats․ Horizontal and vertical formats are also common, catering to different player preferences․ Some layouts emphasize space for notes, while others prioritize quick reference sections for skills and ability scores․ Community-created sheets frequently include customizable themes and art, offering a personalized touch․ These designs ensure that players can easily track their characters’ progress while maintaining a visually appealing and practical format for both digital and printed use․

Structure of a D&D 3․5 Character Sheet

A D&D 3․5 character sheet typically includes sections for basic information, ability scores, skills, feats, equipment, spells, and combat statistics, with fillable forms for easy customization in PDF format․

Basic Information Section

The Basic Information section of a D&D 3․5 character sheet includes essential details such as Character Name, Race, Class and Level, Alignment, and Campaign․ This section also covers physical attributes like Age, Gender, Height, and Weight, providing a quick overview of the character’s background․ Additionally, fields for Deity and Player Name are often included to add depth and context․ Many PDF versions of the 3․5 sheet feature fillable forms, allowing players to easily input and update their character’s basic information․ This section serves as the foundation for the rest of the sheet, ensuring all critical details are readily accessible during gameplay․

Ability Scores and Modifiers

The Ability Scores and Modifiers section of a D&D 3․5 character sheet is crucial for determining a character’s capabilities․ It includes the six core abilities: Strength, Dexterity, Constitution, Intelligence, Wisdom, and Charisma․ Each ability score is accompanied by a modifier, calculated by subtracting 10 from the score and dividing by 2․ These modifiers influence skills, combat, and spellcasting․ For example, a Strength score of 16 yields a +3 modifier, enhancing melee attacks and carrying capacity․ Many PDF sheets feature tables or fillable fields for easy tracking, ensuring players can quickly reference their character’s abilities and modifiers during gameplay․

Skills and Feats Section

The Skills and Feats section of a D&D 3․5 character sheet is essential for detailing a character’s proficiencies and special abilities․ This section lists all the skills the character is trained in, along with their respective ranks and modifiers․ Feats, which provide unique abilities or enhancements, are also recorded here․ Many PDF sheets include checkboxes or fillable fields for easy tracking of skill levels and feat selections․ This section is crucial for determining a character’s effectiveness in various in-game situations, such as combat, persuasion, or problem-solving․ Players can use this section to plan their character’s progression and optimize their abilities for specific playstyles․

Equipment and Inventory Management

The Equipment and Inventory Management section on a D&D 3․5 PDF character sheet helps players keep track of their character’s possessions․ This section includes lists for weapons, armor, magical items, and adventuring gear․ Many PDF sheets offer fillable fields and checkboxes to easily add or remove items․ Some also feature auto-calculation for weight, cost, and space, ensuring players can manage their inventory efficiently․ This section is vital for maintaining game balance and ensuring characters are prepared for various challenges․ Proper inventory management also enhances gameplay by allowing players to focus on strategy rather than tracking every detail manually․ Organized layouts make it easy to update gear as the game progresses․

Spells and Magic Section

The Spells and Magic section of a D&D 3․5 PDF character sheet is designed to help players manage their spellcasting abilities․ This section typically includes tables for tracking spell slots, known spells, and spell-like abilities․ Players can list spells by level, noting their names, schools, and components․ Some PDFs feature interactive fields for marking used slots or adding notes about spell effects․ This section is essential for spellcasters, allowing them to organize their magical arsenal efficiently․ Fillable forms and checkboxes make it easy to update spells as characters progress․ The Spells and Magic section ensures players can quickly reference their abilities during gameplay, enhancing their overall experience․ Proper organization here is key to mastering spellcasting in D&D 3․5․

Combat Statistics and AC Calculation

The Combat Statistics and AC Calculation section of a D&D 3․5 PDF character sheet is essential for tracking vital combat-related information․ This section typically includes fields for calculating Armor Class (AC), attack bonuses, and damage modifiers․ Players can input their armor, shield, and Dexterity modifiers to determine their AC․ Additionally, there are tables for tracking melee and ranged attacks, including columns for attack bonuses, critical hit ranges, and damage rolls․ Some PDFs feature interactive calculations that auto-fill based on entered values․ This section also includes spaces for noting special combat abilities, initiative modifiers, and conditions like flanked or stunned․ Properly managing these stats ensures players can quickly reference their combat readiness during sessions․

Features of a D&D 3․5 PDF Character Sheet

D&D 3․5 PDF character sheets offer interactive fields, auto-calculation for stats, and customizable layouts․ They provide a print-friendly design for easy use at the tabletop․

Fillable Forms for Digital Use

D&D 3․5 PDF character sheets often include fillable forms, enabling digital input for stats, skills, and equipment․ These forms allow seamless updates during gameplay, enhancing organization and accessibility․ Players can edit and save their progress in real-time, making it ideal for online campaigns․ The digital format reduces physical clutter and ensures all character details are easily accessible․ Additionally, many sheets are designed to be compatible with popular PDF editors, offering flexibility for customization․ This feature streamlines character management, making it easier for players to focus on the adventure rather than paperwork․ The convenience of fillable forms has made digital character sheets a favorite among modern D&D enthusiasts․

Interactive Fields and Calculations

Modern D&D 3․5 PDFs feature interactive fields and automated calculations, simplifying character management․ These sheets automatically compute stats like ability modifiers and skill bonuses, reducing manual errors․ Interactive fields allow real-time updates, ensuring all data remains current․ Players can input values once, and dependent calculations, such as AC or attack bonuses, adjust instantly․ This streamlines gameplay, enabling faster decision-making and a smoother experience․ The integration of formulas and conditional logic enhances accuracy, making these sheets indispensable for both new and experienced players․ By automating complex calculations, interactive fields help focus on storytelling and strategy rather than number crunching․

Customizable Layouts and Themes

D&D 3․5 PDF character sheets offer extensive customization options, allowing players to tailor layouts and themes to suit their preferences․ From fantasy-inspired artwork to minimalist designs, users can choose themes that match their campaign’s aesthetic․ Customizable fonts, colors, and spacing enable personalized styling․ Some sheets even allow rearranging sections, such as moving spells or equipment to more accessible locations․ This flexibility ensures that players can create a sheet that reflects their character’s identity while maintaining functionality․ Whether for digital or print use, customizable layouts enhance both readability and immersion, making each character sheet unique to its owner․ This feature is particularly popular among players seeking a blend of practicality and visual appeal․

Print-Friendly Design

D&D 3․5 PDF character sheets are designed with print-friendly features, ensuring crisp and clear output for physical use․ High-resolution fonts and optimized layouts minimize ink consumption․ Many sheets include white space reduction and grayscale options to prevent excessive ink usage․ Margins are often adjusted to fit standard printers, and essential sections like ability scores and skills are prominently displayed․ Some PDFs even offer a “printer-friendly” mode, removing unnecessary graphics for a cleaner look․ These designs ensure that players can easily print and organize their sheets, whether for home games or conventions․ The focus on practicality makes these PDFs ideal for both digital and physical play, catering to all player preferences․ This ensures a seamless transition from screen to paper without losing functionality or clarity․

Tools for Creating and Editing D&D 3․5 PDFs

Essential tools include PDF editors like Adobe Acrobat and free alternatives for customization․ Online generators streamline sheet creation, while software like Excel or specialized D&D apps automate calculations and formatting, ensuring accuracy and efficiency for players and DMs alike․

Best PDF Editors for Character Sheets

For editing and customizing D&D 3․5 PDF character sheets, Adobe Acrobat and Foxit PhantomPDF are top choices, offering advanced form editing and fillable field support․ PDF-XChange Editor is another excellent option, known for its user-friendly interface and robust features․ Free alternatives like LibreOffice Draw or online tools such as Smallpdf and DocHub also provide basic editing capabilities․ These tools allow players to modify layouts, add custom fields, and ensure calculations are accurate․ For those preferring digital solutions, fillable PDFs with interactive fields are ideal for streamlining character management․ Whether you prefer paid or free options, these editors enable seamless customization and efficient tracking of your D&D 3․․

Online Generators for D&D 3․5 Sheets

Online generators simplify creating D&D 3․5 character sheets by automating calculations and organizing data․ Websites like ddb․ac and PCGen offer comprehensive tools for generating custom sheets․ Roll20 and DNDBeyond provide interactive platforms where players can build and export sheets as PDFs․ These platforms often include pre-built templates, ensuring all necessary sections are covered․ Some generators also allow customization, letting users add personal touches or specific campaign details․ For quick setups, online tools are invaluable, saving time and reducing errors․ They are perfect for both new and experienced players aiming to create detailed, accurate character sheets efficiently․

Software for Customizing Character Sheets

Various software tools are available for customizing D&D 3․5 character sheets, offering flexibility and personalization․ PCGen is a popular choice, enabling players to create and edit sheets with automated calculations․ Roll20 and DNDBeyond provide digital platforms for designing and managing character sheets, with options to export them as PDFs․ Additionally, tools like Adobe InDesign or Photoshop allow users to craft visually appealing custom layouts․ For those preferring simplicity, online editors like PDFescape or Smallpdf enable direct modifications to existing PDF templates․ These software options cater to diverse needs, from intricate design customization to straightforward editing, ensuring players can tailor their character sheets to suit their preferences․

Customization Options for D&D 3․5 Sheets

Players can personalize their sheets with custom art, themes, and layouts․ These options allow for tailored designs, enhancing both functionality and aesthetic appeal for unique character representation․

Personalizing Your Character Sheet

Personalizing your D&D 3․5 character sheet allows for a tailored experience, ensuring it fits your character’s unique identity․ Players can modify sections to highlight key abilities, skills, and equipment, making the sheet more organized and visually appealing․ Customizable layouts enable rearrangement of sections, such as prioritizing spells or combat stats․ Additionally, users can incorporate personal artwork or themes, giving the sheet a distinct aesthetic․ Digital tools permit further customization, such as adding interactive fields or adjusting fonts and colors․ This level of personalization enhances gameplay by streamlining access to essential information․ Whether for aesthetics or functionality, a personalized sheet elevates the role-playing experience, making it truly one-of-a-kind for each character․

Adding Custom Art and Themes

Enhancing your D&D 3․5 character sheet with custom art and themes adds a unique touch, making it visually distinct․ Players can incorporate illustrations that reflect their character’s race, class, or background, creating a personalized aesthetic․ Themes ranging from medieval fantasy to dark gothic styles can be applied, ensuring the sheet aligns with the campaign’s tone․ Digital tools allow for easy insertion of artwork, while printable sheets can include pre-designed borders or backgrounds․ This customization not only improves the sheet’s appearance but also immerses players deeper into their character’s lore and the game’s atmosphere, enriching the overall D&D experience through visual storytelling and artistic expression;

Modifying Layouts for Specific Classes

Customizing D&D 3․5 character sheets for specific classes enhances gameplay by prioritizing relevant information․ For example, spellcasters like wizards or clerics benefit from expanded spell sections, while fighters may need detailed weapon and feat trackers․ Rogues and rangers might require larger skill or combat tactic sections․ Players can adjust layouts to emphasize class-specific abilities, such as adding spell slots for casters or extra space for barbarian rage details․ Digital tools allow users to drag-and-drop sections, creating a tailored experience․ Printable sheets also offer templates designed for particular classes, ensuring clarity and efficiency during gameplay․ This customization streamlines character management, making it easier to track abilities and stats specific to each class, improving overall organization and immersion in the game․

Sources for D&D 3․5 Character Sheets

Official Wizards of the Coast and DriveThruRPG offer free D&D 3․5 PDFs․ Community-created sheets are also available online, providing diverse layouts for players․

Official Wizards of the Coast Resources

Wizards of the Coast provides official D&D 3․5 character sheets through their website and platforms like DriveThruRPG․ These sheets are designed to maximize space for notes and records, offering a folio-style layout․ They include sections for basic character details, ability scores, skills, feats, equipment, spells, and combat statistics․ The official PDFs are free to download, ensuring accessibility for all players․ They are formatted for both digital use and printing, making them versatile for in-person and online games․ These resources are considered the standard for D&D 3․5 character creation and management․

DriveThruRPG and Other Official Platforms

DriveThruRPG is a trusted platform for downloading official D&D 3․5 character sheets․ It hosts a wide range of PDF resources, including the standard Wizards of the Coast character sheets and community-created designs․ Players can find interactive and customizable sheets, perfect for both digital and print use․ These platforms ensure high-quality downloads, often optimized for fillable forms and automatic calculations․ DriveThruRPG also offers exclusive content, such as folio-style layouts designed to maximize space for notes and records․ Whether you prefer classic designs or innovative layouts, these platforms provide reliable and official resources for managing your D&D 3․ with ease and precision․

Community-Created Sheets and Resources

Community-created D&D 3․5 character sheets offer diverse and innovative designs․ Fans and enthusiasts have developed custom PDFs with unique layouts, art, and features tailored to specific playstyles․ These sheets often include additional sections for tracking campaign-specific details, homebrew rules, or alternative character builds․ Platforms like Reddit’s r/rpg and D&D forums showcase a variety of user-generated content․ Some creators even provide editable versions, allowing players to personalize their sheets further․ Community resources also include fillable forms, interactive fields, and artistic themes, making them a popular choice for players seeking more customization and flexibility in their character management․

Downloading and Printing D&D 3․5 Sheets

D&D 3․5 character sheets are widely available as free PDFs online․ Download from official sources like DriveThruRPG or community sites, then print on high-quality paper for durability․

Where to Find Free PDF Downloads

Free D&D 3․5 character sheet PDFs are readily available online․ Official sources like DriveThruRPG and Wizards of the Coast’s resources offer downloadable sheets․ Community platforms such as Reddit’s r/rpg and fan-made websites also provide a variety of customizable and fillable forms․ Additionally, some academic institutions, like the University of Hawaii, host free character sheets for public use․ These PDFs are often designed for easy printing and include sections for stats, skills, and equipment․ Popular options include the standard 4-page folio layout and interactive versions for digital use․ Always ensure downloads are from trusted sources to avoid malware risks․

  • DriveThruRPG
  • Wizards of the Coast
  • Community forums
  • Academic sites

Printing Tips for High-Quality Sheets

For crisp and durable D&D 3․5 character sheets, use high-quality paper with a brightness rating of 96 or higher․ Print on both sides to save paper and keep your character’s details organized․ Use a laser printer for sharper text and better durability․ Consider laminating the sheets for long-term use, especially if you plan to write on them frequently․ Adjust your printer settings to “Fit to Page” to ensure the layout is preserved․ Some players also prefer spiral binding for easy flipping between pages․ Always preview the PDF before printing to ensure proper alignment and clarity of text and tables․

  • Use high-brightness paper
  • Print double-sided
  • Laser printer recommended
  • Consider laminating

Binding and Organizing Your Sheets

Organizing your D&D 3․5 character sheets can enhance gameplay and accessibility․ Consider using a three-ring binder with page protectors to keep your sheets clean and secure․ This allows easy addition or removal of pages as your character evolves․ Use dividers to separate sections like abilities, spells, and equipment․ For a more compact option, spiral binding is ideal, especially if you prefer a booklet format․ Some players also use tabs or color-coded sections for quick reference․ Proper organization ensures you can find information quickly during sessions, minimizing downtime and keeping the game flowing smoothly․

  • Use a three-ring binder with protectors
  • Add dividers for different sections
  • Consider spiral binding
  • Use tabs or color-coding